Archive for the ‘Construction’ Category

Coming down the home stretch

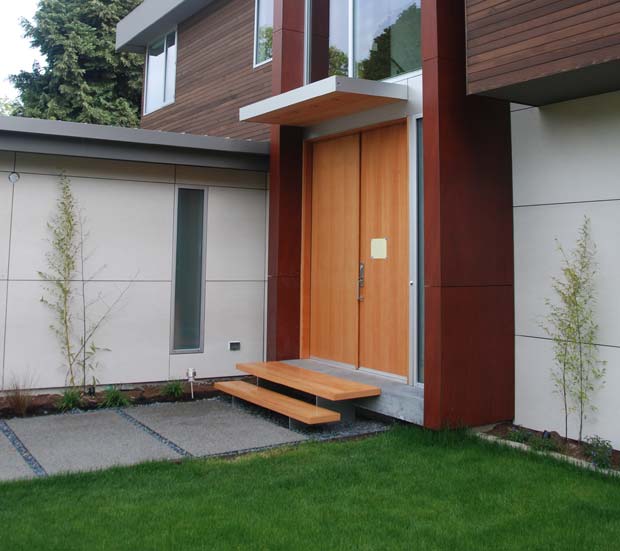
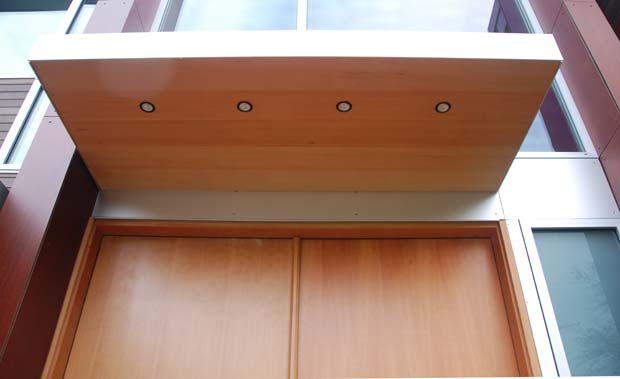
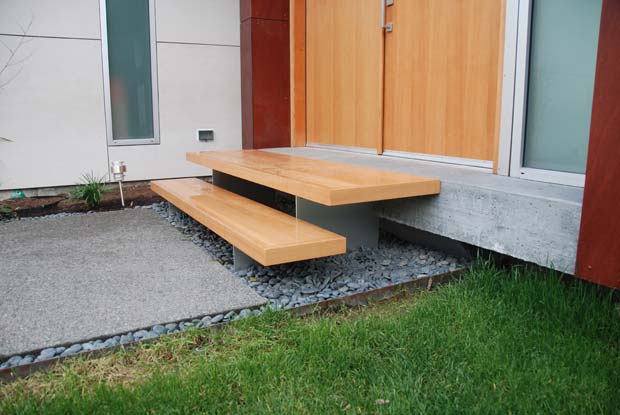
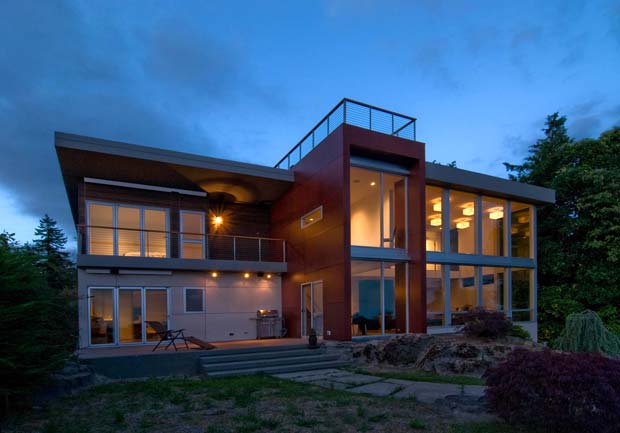
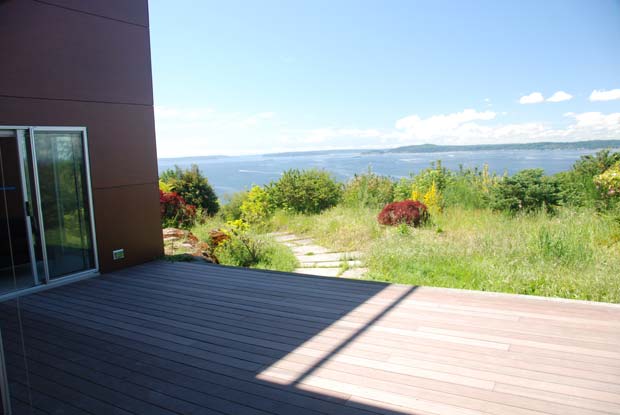
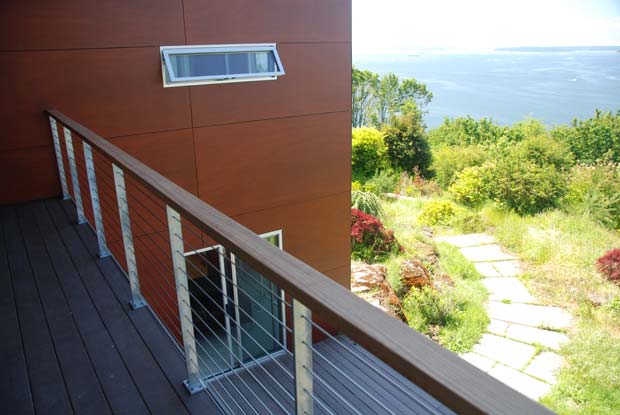
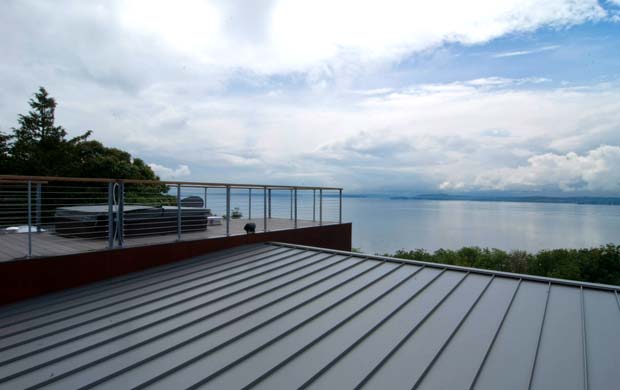
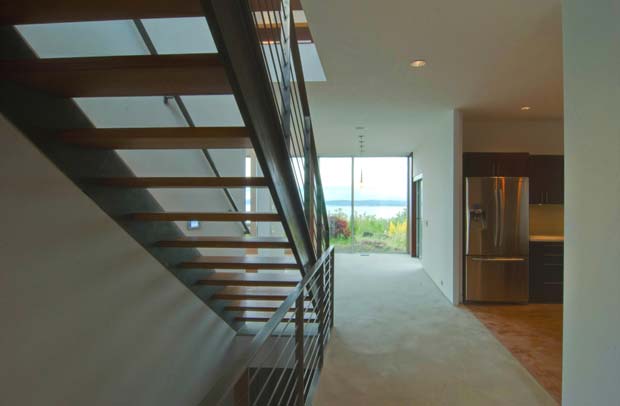
According to the schedule, we’re only about three weeks away from occupancy now. From looking at the house, it feels more like six weeks, but I’m told things come together extremely rapidly at the end. So many of the surfaces are still covered in protection and there’s so much dust and debris around that it just looks a lot less finished than it actually is. On the bright side, coming to the house every day now is a complete joy as a new element is finished and uncovered almost every day.

If we really end up being done in three weeks, the project will have come in only about five or six weeks late and only about $8000 over budget. I’ll explain this in a later post, but both the time and the budget are a bit misleading though because we added approximately 1300 square feet in the form of a fully finished basement and some other things to the project and still came in close to the original monetary and time budgets.

Things are definitely getting a little hectic as Build and the many different subcontractors involved at this point scramble to put all of the remaining pieces in place. There are a ton of things to coordinate and if I was acting as my own G.C., this is where things would really start to fall apart, if they hadn’t already.

I have a bunch of miscellaneous costs to recognize in this post that have occurred over the last couple of months, so if you have costs turned on, you should see them below.

Costs accrued during this stage:

Millwork supplies (Compton Lumber)$2,062.64
Carpentry labor (Rivera 26 Remodeling)$1,256.51
Carpentry labor (Rivera 26 Remodeling)$1,809.30
Carpentry materials (Compton Lumber)$801.62
Carpentry labor (Rivera 26 Remodeling)$2,890.80
Installs, carpentry, and general conditions (Build LLC)$11,675.00
Honeybucket rental$117.19
Installs, carpentry, and general conditions (Build LLC)$11,295.00
Debris removal (Take-It-Away Hauling)$598.45
Fence rental additional month (National Construction Rentals)$26.67
Honeybucket rental$125.71
Miscellaneous materials (Tacoma Screw)$90.32
Miscellaneous site work (Economy Concrete Cutting)$328.50
Miscellaneous expenses$387.21
Miscellaneous expenses$1,826.51
Gas line install (Puget Sound Energy)$3,651.00
Seattle City Light (power connect fee)$789.00

Ok, now we’re really almost done

In my last post from six weeks ago, I wrote that we were three weeks away from completion according to the schedule, but that it felt more like six weeks out to me. Well, it’s six weeks now, and we’re mere days away from final inspection and an occupancy permit. As of now, we’re aiming for next week.

A lot has gone on in the final two months of construction that has served to push our date back, including:

  • An extensively cracked concrete floor
  • Various parts — mostly electronic — which are not stocked locally and have taken weeks to arrive
  • Redoing the awning
  • Redoing some tile
  • Settling on a lighting scheme
  • Dealing with the technological circus that is our exterior motorized blinds

… and several other things.

I haven’t posted about all of this stuff individually yet, because I’m waiting for resolution first. Since I’m naming sub-contractors here (generally endorsing their good work), I don’t want to publish a negative post when something goes wrong only to have the sub-contractor go out of their way to make everything right. I try to judge everyone on this job not just by their ability to avoid problems but mostly by the final outcome of their work. For things like our bamboo floor, our concrete hallway, and the motorized blinds, the “final outcome” has been very much in limbo for months now as contractors finish up their work. When it’s all done next week, I will have full posts on each item.

We’re still very much on budget, and although we are about two months past the originally planned completion date, I would argue that date was too aggressive to begin with. Nice houses take time, and 9 months just isn’t long enough. If we get done in the next two weeks, it will be 11 months from when deconstruction began, and I’m perfectly satisfied with that duration.

The new awning and front stairs are complete

We’re in hopefully the last week of work right now, as various punchlist items get taken care of and we get ready to move in. One item I discussed several weeks ago in “Offing the Awning” was the poor appearance of the front canopy. I’m happy to say that this has now been successfully resolved and we have a beautiful new canopy in front which ties in much more tightly to the overall design of the house:

The fir from the canopy, door, and stairs now tie together beautifully.

The puck lighting underneath the canopy provides just the right amount of light to illuminate the wood.

The fir stairs provide a warm entrance and the aluminum underneath offers a minimalist support structure.

Overall, I’m extremely happy with the finished product. This is one of a handful of items we pushed back on very hard from a design standpoint, and although it felt stressful and unsatisfying at the time, I’m really glad we insisted on this refined approach. It cost me a few thousand dollars in the end, but since we’re still using the steel frame of the original canopy inside of the aluminum/fir casing, it’s still providing some value. UPDATE: Kevin from Build pointed out to me that although the finished cost of the canopy is more than originally spec’d, not a penny of the cost was actually wasted due to the fact that the steel frame is simply acting as the skeleton now. Fair point.

Not to be overlooked, the fir stairs are also the result of pushing back against a proposed solution (steel) that we never got comfortable with. The lesson for this phase of the project is: if you aren’t comfortable with a certain material, insist that it be eliminated as an option early on. Occasionally you will be pleasantly surprised by such things, but more often, you know your tastes better than anyone else does.

Costs accrued during this stage:

Front canopy fabrication (Twisted Metalworks)$1,000.00
Galvanize front canopy (Scott Galvanizing)$416.10
Aluminum for redone canopy (Alaskan Copper & Brass)$687.00
Aluminum anodizing for redone canopy (Hytek Finishes)$300.00
Delivery of anodized aluminum for redone canopy (Pacific Delivery)$130.81
Delivery charges (Pacific Delivery Service)$352.18
Miscellaneous materials (Compton Lumber)$1,198.59
Aluminum fabrication for redone canopy (Special Projects Division)$832.20

Stacking the decks

Having just spent four years in a condo without a deck, the importance of nailing one’s deck strategy was clear to me from the start of this project. I wanted decks in as many places as it made sense, in order to take advantage of the property’s great views and outdoor entertaining potential.

There was already a large patio area outside where the old house used to be so that part was easy. Here’s what the patio looks like now:

Additionally, the plans called for a master bedroom facing southwest looking over Puget Sound so putting a little reading deck out there was an easy call as well. We ended up making this deck about two feet shallower so we could extend the interior space of the master bedroom out a bit, but it’s still plenty big enough for having a glass of wine or reading a book on. Here’s what it looks like:

The coup de gras grâce, however, is the rooftop deck. I don’t understand why everybody doesn’t build one of these. Flat roofs with rooftop decks are so much more useful and fun than sloped roofs with, uhhh, shingles. If you have any sort of view whatsoever, you should have a rooftop deck. Here’s how ours ended up:

Now on to some particulars…

For the material, we ended up using Trex Brasilia in espresso color. I did a ton of research into decking materials and concluded that there are no panaceas. The only wood that is as durable and trouble-free as I’d like is ipe, but it cannot easily be stained and tends to silver quickly — a look I was not interested in. Concrete pavers are the lowest maintenance option, but they feel tough on the feet and we already have enough concrete around the outside of the house. Composite decking reviews are all over the map with some installations performing well for people and others exhibiting mold and other problems fairly quickly. We ended up going with Trex because it is a brand that’s been around a long time and it looked the least fake to us. So far so good on the Trex.

For railings, we went with ipe for its low maintenance qualities. Since it’s just the railing, we don’t mind the silvering here.

For posts, we went with galvanized steel with steel cables running through them. I’m not a huge fan of how galvanized steel looks and went to great pains to minimize its use throughout the project (particularly on the awning), but considering the low profile of the posts, it was a good low maintenance material to use here.

As mentioned in the hot tub post, we went with a HotSpring Sovereign hot tub for the rooftop deck and couldn’t be happier with it so far. It might be the best feature of the house.

Costs accrued during this stage:

Decking materials (Plywood Supply)$6,211.84
Decking parts and labor (Deerly Construction)$5,441.28
Decking materials (Compton Lumber)$1,411.08
Decking materials (Plywood Supply)$2,206.22
Decking parts and labor (Brett Deerly)$4,601.40
Trex Brasilia decking material (Plywood Supply)$1,788.35
Deck railing (Feeney)$3,588.94
Deck flashing (Precision Fabricators, LLC)$592.61
Guardrail galvanizing (Scott Galvanizing)$135.78
Guardrail fabrication (Twisted Metalworks)$5,164.85

A short post about the fireplace, the stairs, and the awesomeness of Bart

In the web business, there is a chain of people involved in most projects. Chronologically speaking, it goes something like this: client (who hires the firm), account planner (who writes the brief), designer (who designs the mocks), engineer (who writes the backend), and then the “front-end developer” (who puts all of the pieces together and makes the finished product work). As anyone in the web business knows, the person who often gets the short end of the stick is that last cog in the chain. Any number of delays or problems can occur earlier in the chain, and the last person is still expected to hit the agreed upon date.

In the design/build process, that person is the builder/foreman, and at Build LLC, that person is Bart Gibson. As Kevin, Andrew, and I muck around on details, drop the occasional ball, or change our minds on something, Bart is still expected to make all the ends meet, on time and on budget. Not only did he do exactly that — stage after stage, nail after nail — but he also lent his craftsmanship to two notably custom parts of the house: the blackened steel fireplace surround and the open bamboo stair treads.

The fireplace surround

As mentioned in We Have Fire, we ended up going with a modern Heat N’ Glo Cosmo fireplace. It’s a clean looking unit, but recessed into drywall, it doesn’t command a ton of attention. To give it more presence in the great room, Bart fabricated a custom blackened steel surround for it. The steel panels create a striking vertical stack while also providing a thermal mass heat conductor to more efficiently radiate heat throughout the room. Apparently you can blacken steel using either a hot or cold process. The hot process is extremely dangerous however (and can kill you) so thankfully Bart used the cold. It looks really great.

The bamboo treads

It’s very hard to find open stair treads that are more than an inch thick and don’t have unsightly bullnoses on them, especially in bamboo. Open tread regulations are much stricter than they were a few years ago because of fears that a child could fall through the treads, but if you plan correctly, you can fabricate custom stairs that are plenty safe but also minimal in appearance.

Starting with large slabs of bamboo plywood, Bart built each two-inch thick stair tread by gluing two one-inch slabs together using a special cut such that the whole thing looks like one two-inch thick solid piece of bamboo. They are really, really beautiful, and because Bart stained each one individually, they match the bamboo floor almost perfectly. If you’re looking for a really clean open tread design, this is a great way to go. The stairs took quite a bit of massaging to get perfect but Bart and the team at Build pulled it off flawlessly.

Costs accrued during this stage:

Blackened steel fireplace surround (Bart)$3,500.00
Stair tread parts and labor (Build LLC)$9,372.50

Hardscape Detail

One of the most successful aspects of the entire project, without question, has been the hardscaping. Not only were the contractors — Jim and Jim of Blackhawk Construction — among our favorite people to work on the job, but we feel like we got a lot of really sharp looking exterior concrete work done for a very reasonable price.

Concrete comes in many flavors. It’s often hard to explain exactly what you are looking for, so early on, we searched the neighborhood for samples that looked nice. Luckily, there was a driveway only a few blocks away that featured exactly the style we had in mind: medium grey with a finer than normal aggregate. The finer grain provides a more modern look in our opinion, so we had the Jims whip up a few samples to look at. They nailed it on the first try and immediately began work on our back steps, our side walkway, our front pavers, and various other concrete forms around the exterior of the house.

Another touch we added was the placement of Mexican beach pebbles between the pavers and surrounding other parts of the house. Though ostensibly Mexican, they provide a very Japanese feel. We ordered them from Coverall Stone.

Make sure to check out the full hardscape photo collection in the photo gallery.

Costs accrued during this stage:

Gravel (Salmon Bay Sand and Gravel Co.)$876.08
Concrete work (Blackhawk Construction)$20,119.27
Concrete stairs, wall, and other hardscapes (Blackhawk Construction)$5,985.27
Concrete treads for garage landing (Diamond Concrete Products)$547.96
Steel rails bordering path pebbles (Everett Steel)$406.51
Exterior stairs (Olda Zinke)$2,069.55
Delivery charges (Pacific Delivery Service)$272.71
Mexican Beach Pebbles (Coverall Stone)$1,340.00

The Complete Timelapse

Putting together the final timelapse was a lot more difficult than expected. Since the construction cam was snapping one shot every five minutes and saving it to my server, there were 288 shots for every one of the 335 days of the project. That’s 96,480 shots. At 30 frames per second, that would be a 53 minute long timelapse movie! Not only is that way too long, but the file would be huge and filled with a lot of night shots and days with no interesting activity.

Via some unix command-line magic, the first thing I did was systematically delete all nights and weekends. This eliminated about 75% of the images producing a 13 minute movie. It was still, however, too long, too big, and filled with too many stretches of marginal exterior progress. At that point, I opened up my FTP program and started going through all 22,000 of the remaining images and deleting any stretches of time that lacked exterior activity. The end result was a final movie consisting of 5929 images and lasting a little over three minutes… and here it is:

… and with that, A House By the Park is essentially concluded! It’s been fun writing this journal, and hopefully if you’re about to start a new project of your own, you’ll get as much out of it as I put into it. One final thanks as well to my friends at Build, without whom, this project wouldn’t have gone nearly as smoothly.

At long last, it’s time to stop neglecting my main blog and begin writing over at Mike Industries again.

Thanks for following along. It’s been fun.