Archive for January, 2010 —

We Have Fire

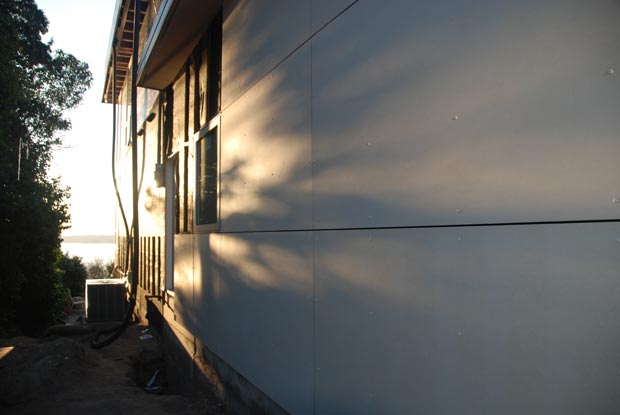
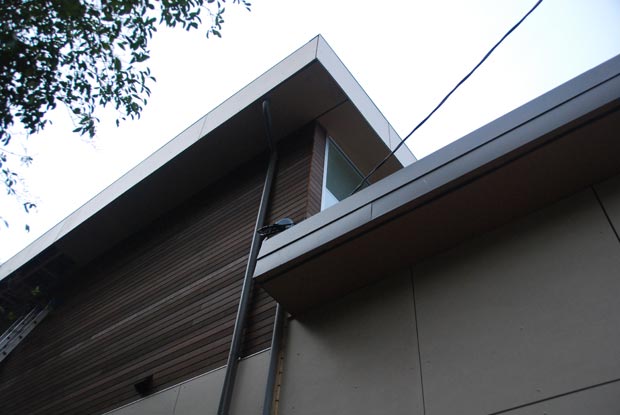
Drywall is almost done and siding is finishing up, so I thought I’d write a little about the fireplace that was installed several weeks ago and how we picked it.

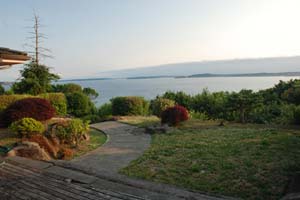
Before we took down the old house, there was a bit of discussion about keeping the old wood burning fireplace. I don’t mind traditional fireplaces at all, and the existing one carried with it the benefit of being able to heat both the basement and the main floor. In the end, however, the masonry just took up too much space and didn’t fit the overall design plans. I was not sad to see it go, but I think Build might have shed a tear.
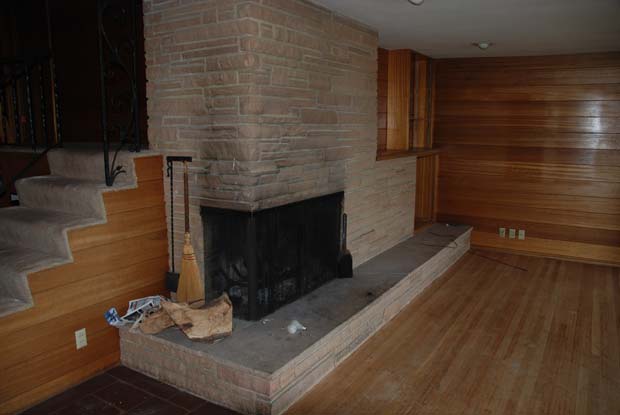
The old hotness

In shopping for a new fireplace, it quickly became clear that if I wanted something that wasn’t going take up a whole lot of room, a gas or denatured ethanol burning one was the way to go. Although the ethanol burning ones were really sharp looking and flexibly designed, it seemed silly to buy one considering I’m already running a natural gas line to the house. The choice between never refilling my fuel supply and doing it every few/several weeks was easy.

When it comes to natural gas fireplaces, you can either go with direct-vent or vent-free. In a direct-vent setup, air is drawn in from outside the house while the fumes are blown out the same way. In a vent-free setup, air is drawn from the interior of the house, heated up, and then blown back into circulation. While vent-free fireplaces are generally thought to be safe enough, they do reduce the oxygen level inside a house, and some people point to this as a potential hazard. They are also a potential carbon monoxide hazard if improperly designed. For these reasons, it didn’t make any sense to go vent-free, considering running a vent was relatively easy.

Another important safety consideration is purchasing a fireplace that is “UL Listed”. This designation means that an organization called Underwriters Laboratories has tested the product for safety. Many insurance companies will not cover damage caused by non UL Listed fireplaces, so unless you’re not worried about burning your house down, it’s best to stick with UL Listed equipment.

If you’re looking for a direct-vent gas fireplace, your options are abundant. There are probably 1000 models to choose from. If, however, you want a modern looking one without fake logs or other distracting elements, your choice of manufacturers drops to about 4. Not only that but your price explodes into the ridiculousphere.

To see what was out there and how much it would cost, I contacted three fireplace dealers in Puget Sound and was less than impressed with the results. Two of them had nothing modern and weren’t particularly interested in pointing me elsewhere. The third one, Kirkland Fireplace, was even worse. I called to explain what I was looking for, and the guy on the other end told me he’d e-mail me some models to choose from. After a week, I still had not received an e-mail from him. Then I called again, told a new guy what happened with the first guy, and after apologizing he said he would send me the information. One more week went by with no email, no phone call, and no other follow-up from Kirkland Fireplace.

I don’t understand how a place like this stays in business. It’s like I’m calling them up and saying “Here, I have $5000 I want to place into your hands” and they are saying “Thanks, but we’re playing X-Box right now.” Especially in the middle of a severe economic/housing downturn, it shocks me that a place like this would be so unresponsive to unsolicited business. If you’re looking for a fireplace, I would stay away from Kirkland Fireplace.

After researching the options from Montigo, Spark, and Lennox — the only UL-listed modern gas fireplaces available in the U.S. — I happened upon the spankin’ new Heat & Glo site.

“Heat & Glo” you say?!?!

Yes! The trusty old manufacturer of fireplaces your grandparents would own.

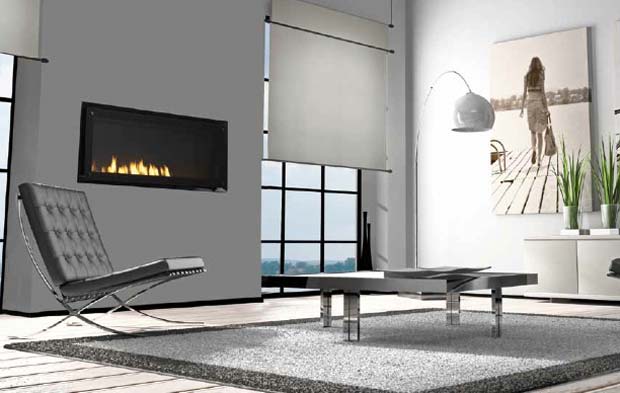
Turns out Heat & Glo now makes a line of sharp looking modern fireplaces at convenient sizes and lower price points than their competitors. There were two models that looked great: the Red 40 and the Cosmo SLR. Both models were similar in appearance but the Cosmo was less expensive and didn’t have the crazy LED stuff I didn’t need. At just over $4000 delivered and installed, the Cosmo SLR was less than half the price of some of the other options (again, I can’t believe how expensive a simple gas burner can be if it’s marketed as “modern”… non-modern models can be had for $750).

Upon deciding to go with the Cosmo, the only question was where to purchase. Thankfully, I found Bill at Fireside Hearth & Home who hooked me up, delivered and installed the thing within three weeks, and gave me great service along the way.

The new hotness (photo from Heat & Glo)

The fireplace isn’t connected yet because we’re still waiting for the gas line, but it’s sitting pretty, ready to light up the living room right now. We’ll be hooking up the gas line and installing the blackened steel fireplace surround in the coming weeks.

UPDATE: For a look at the finished fireplace, complete with custom blackened steel surround, see this post.

Costs accrued during this stage:

Heat & Glo Cosmo SLR Fireplace$4,319.00

Siding is finally (almost) done.

I’ve gotten into a bad habit on this blog of waiting until major stages are complete or major decisions are made before posting. It makes for good, succinct reading, without a ton of incomplete updates every other day, but the downside is that I lose the ability to take advice from readers before strings are pulled. For that reason, I’m going to try and post more frequently until the project is complete, starting now.

The big news of the week is that siding is finally nearing completion. Given how many different materials I’m using and how much detail is involved, it’s taken about a month and a half to side the house so far, and there’s still probably a week or two left. Brett Deerly and the crew over at Deerly Construction have done a great job so far, often working on weekends, and pounding away in the driving Seattle rain. Getting rainscreen siding to align perfectly is a difficult task and I’m really happy with the results so far.

The specifics of the siding are as follows:

The lower massing

The ground level of the house is clad in rainscreen paneling made by Cembonit. Although rainscreens have been used in Norwegian architecture for centuries, they only made it to the United States during the 1950s. Within the last several years, they’ve gained popularity in American modern home design.

The concept behind a rainscreen is that you have a waterproof, Gore-Tex-like fabric wrapping your framing and then solid panels installed over the Gore-Tex. The panels catch most of the rain carrying it down to the ground while the fabric catches and repels the rest. The panels have quarter-inch gaps between them so they effectively let the whole assembly “breathe”. The idea is that you concentrate more on letting water get out of the structure as opposed to keeping it from getting in. Sealed materials like stucco try to do the opposite: keep water out at all costs. The problem with this strategy, however, in a wet environment like Seattle, is that if it fails (which it often does), it fails badly. Water gets trapped inside the stucco and you have major problems. When you see houses or condos getting their siding replaced within ten years of going up, this is usually what has happened.

Truth be told, I actually prefer the look of well done stucco or wood siding, but the practical benefits and low maintenance of the rainscreen system made it desirable for this project.

We chose Cembonit because unlike the more commonly used HardiePanel siding, it is pure cement board. There are no cellulose fibers, and thus it is extremely rigid and durable. It also comes pre-dyed in several colors, so it doesn’t require any painting (although you can paint it if you’d like).

It turns out Cembonit is not being shipped to North America anymore, but we found a place in Kentucky that had a bunch of it and got a great deal at $4 per square foot. The siding is more or less the color of light concrete… a little warmer maybe.

The upper massing

We ended up going with locally-grown red cedar, stained dark brown, for the upper massing of the house. Although I love the look of wood, I hate the maintenance of it, so we limited our use of wood siding to areas mostly sheltered by eaves. The wood will clearly see a bit of sun and rain, but not as much as other, differently-clad areas of the house. We went with a semi-transparent stain in order to let some of the woodgrain show through but still maintain a reasonable amount of protection against the elements.

One thing I’m not super excited about right now is the corner detail of the cedar siding. One side is just kind of butted up against the other side at the corner, exposing the edge grain, which is currently unstained. When the edge gets stained, it will certainly look better, but it seems like mitering the corners would have produced a slightly cleaner look. We’ll see how that one turns out though… could be perfectly fine once it’s done.

The west window wall

The giant wall of windows facing Puget Sound will be clad in anodized aluminum to match the window frames. This should produce a pretty dramatic, but hopefully not overly bright effect. Not that this is important to me, but I imagine this will make the house pretty unmistakable from the water and even possibly from Bainbridge Island.

The box

The box is the signature design element of the entire house. It’s the sort of thing you’d more often see in the design of a museum than a residence. For this reason, it was crucial we clad it in a material that was attractive and wouldn’t weather with the elements. Build initially pushed hard for brazilian ipe, but I was too afraid of what it would look like when it inevitably silvered. Part of the challenge of the box, is that some of it is inside and some of it is outside. Some faces east, some faces west, some faces north, and some faces south. Its exposure to the elements is very uneven and so it was important to choose a material that would stay as pristine as possible no matter what exposure it received.

I also didn’t want any more cold, industrial material like metal because I’m trying to keep the house warm looking (often a challenge in modern home design).

The only material that fit the bill perfectly was something called Prodema. Prodema is, according to the company, “a high-density panel comprised of a thermosetting phenolic resin bonded cellulose fiber core faced with natural wood that has been coated with Prodema in-house formulated acrylic resin-PVDF protective finish ensures a panel colour fastness of 3-4 in a 3000 hour xenon lamp test (by NEN-ISO 105-a03) and perfect resistance to loss of gloss (by DIN 67530).”

In other words, it’s a mostly synthetic panel with a real wood veneer that is maintenance-free and extremely resistant to water and sun. Real wood without the trouble of real wood. I’d seen Prodema on a couple of other houses in Seattle as well as some commercial applications and it always looks great. I’ve heard some stories about Prodema failing, but the warranty should take care of that if it happens.

Another challenge we had when deciding how to wrap the box was how it would carry through to the inside of the house. In the end, we decided to wrap it a couple of feet into the interior, on all sides. Carrying it along the entire interior of the box would have looked dramatic, but it was too risky and too ripe for looking dated more quickly.

And finally, I would be remiss if I didn’t mention that there is a similar material called Ecoclad that is made less than an hour away in Tacoma that we could have used instead of the Spanish-made Prodema. Unfortunately, however, the company refused to send us any samples, and I’ve heard from others that they are very difficult to deal with. Such a huge wasted opportunity to use a local material. Thanks for making me ship over a $14 per square foot product from Spain instead.

It’s going to take me awhile to put together the timelapse of the siding but I’ll post it as soon as I have it. For now, there are photos in the gallery.

Costs accrued during this stage:

Cement Board Fabricators (Cembonit)$13,581.00
Specialty Forest Products (cedar siding)$4,972.00
Prodema siding (Formas)$15,237.00
Pacific Delivery Service (siding)$359.00
Snyder Architectural Systems (siding wrap)$1,730.00
Brett Deerly (siding labor)$21,581.00
Excel coatings (stain and treat cedar with Benite)$1,752.00
White Cap Construction Supply (siding supplies)$265.00
Lumbermen's ProBuild (siding supplies)$339.00
Blackstock Lumber Co., Inc (siding supplies)$44.00
Precision Fabricators flashing (siding supplies)$521.00
Miscellaneous siding supplies$1,244.00
Heavy equipment rental$912.00
Aluminum siding (Special Projects Division)$3,419.00
Compton Lumber (siding materials)$426.00
Aluminum anodizing (Hytek Finishes)$360.00
Scissor lifts (United Rentals)$1,540.00
Additional siding labor (Brett Deerly)$1,863.00
Miscellaneous expenses$379.00
Hauling$680.00
Honeybucket rental$117.00