Time-lapse photography is a great way to document a construction project. Setting up a proper time-lapse requires you to answer a few questions before you can get started:
- What are your available locations to mount a camera?
- What are you connectivity options?
- What are your power options?
- What are your image quality requirements?
- Do you want video monitoring as well?
- What are you willing to spend?
Locations
There are really only two choices when it comes to location: either mount a pole somewhere on your property or find a kind neighbor willing to let you put your camera on their property. Mounting a pole would have been a difficult option for me because it would have taken time/effort/expense and it didn’t solve my internet connectivity problem. I could have probably run power to the pole but then I’d have to either rely on a flaky wireless internet connection or build some sort of temporary enclosure for a modem. Not impossible, but not ideal for my purposes.
Luckily, my across-the-street neighbors were nice enough to let me mount a small camera underneath their carport roof, which provided a great viewing angle for the construction and potentially a direct connection to the internet. My neighbors have cable internet, so in order to get me on a completely separate network from them, they ordered a DSL line, which I pre-paid them a year’s service for. The DSL modem has wireless access, but since I needed to power my camera anyway, I planned on buying one that had PoE (power-over-ethernet) built in; that way, one ethernet cord was all that would need to tether the camera.
Connectivity
As mentioned, I went the DSL-from-neighbor’s-house route, but there are many other options to consider. If you have many open wireless networks with strong signals around your property, you can try to mooch off one of those. Or you can offer to pay a portion of a neighbor’s internet bill during construction in exchange for getting access to their network (this is what I originally proposed to my neighbor). Another option is to purchase your own cable or DSL connection and build a waterproof shelter for it somewhere on site.
Other less-than-stellar options include procuring a computer that can accept a Clearwire (WiMax) card and using that for your connection, or using an SD card in your camera and manually transferring images every week or so. There is an SD card called the EyeFi which has built-in wireless transmission but as of the date of this blog entry, it’s missing one critical feature: the ability to delete images after they have been uploaded. Without this feature, the card can fill up even as you are successfully posting your images online.
Power
Power-over-ethernet is really the ideal way to give your device the juice it needs to operate because it kills two birds with one stone: the power and the connectivity. Note that in order for PoE to work, you’ll need a $30 device called a PoE injector which sits between your router and your camera, plugs right into an AC wall outlet, and runs a trickle of power down the ethernet line.
If you can’t do PoE (or if you’re doing it on your property), you can hook up power through the temporary power strike that will be set up on your site.
I looked briefly at battery-based options for powering video cameras and none looked too promising. All were large, expensive, and still obviously required recharging. The only way I’d consider running battery power for a project like this is if I was using a still camera and was cool with swapping a new battery in manually every couple of weeks.
Image quality
There are a few levels of image quality you can achieve in a time-lapse project: 640×480 “security cam quality”, megapixel “web cam quality”, hi-res point-and-shoot quality, or high-res DSLR quality.
The first thing to decide is whether or not you require video streaming capabilities. I didn’t think I did at first and only wanted high quality stills, but after watching my demolition streamed live last week, I am extremely happy I went for the video option. It’s a great way to keep a close eye on the construction site as well.
If you require video streaming, both the point-and-shoot and DSLR options are unfortunately out. To stream video, you need a device with a streaming server embedded in it (or at least the ability to stream it out to a computer over USB), and I’m not aware of any still cameras with this capability.
If you don’t require video streaming, go with a point-and-shoot with a built-in intervalometer or a DSLR that can be attached to an intervalometer. For a great overview of this type of time-lapse project, check out Photojojo’s guide. I also found a site a couple of months ago that listed a ton of cameras with built-in intervalometers but now I can’t find it. If you happen to find it, please post a link in the comments.
Video monitoring
If you’ve decided you want video monitoring capabilities, you’re pretty much limited to 640×480 security camera quality (low) or megapixel webcam quality (better, but not great). Although the megapixel cameras are more expensive, I highly recommend going with one. 640×480 is just too low of a resolution to get a clear picture from.
Axis cams are generally regarded as the gold standard, but the really good megapixel models run upwards of $1000. I went with the Panasonic BB-HCM515A which is about half that price and have been reasonably happy with the results so far. It’s officially an indoor camera, so I’m rolling the dice a bit, but it’s sheltered from the rain so I’m thinking it should be fine.
Price
You can spend anywhere from $50 to about $4000 on your setup, so what you buy depends on your budget. My goal was to keep the project under $1000, including internet connectivity charges.
My particular setup
One of the nice things about the Panasonic is that it has a full web server built into it, with the ability to stream live video to both my computer and my iPhone as well as the ability to automatically FTP still images to my server at any interval I choose. I can also pan and tilt the camera remotely from any web browser as well as give guest access to the stream to friends.
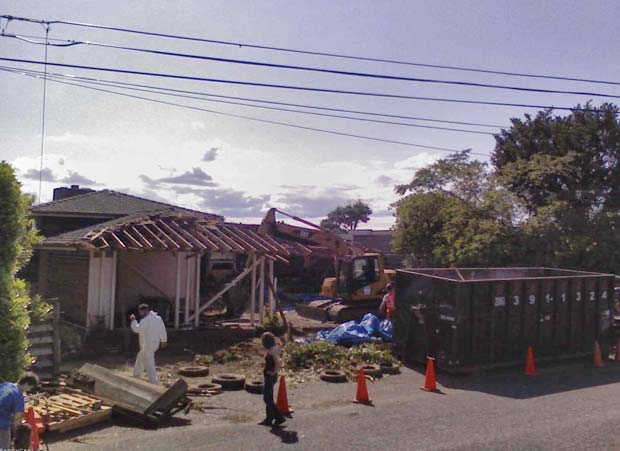
Here’s a nice shot of a crew member dancing for a spectator. Tiffehr happened to catch this while watching the stream.
Via the built-in software, I have the camera set to FTP one image every 60 seconds to my server and overwrite the previous one. That image is displayed on the Live Cam page. Additionally, the camera snaps another shot every 5 minutes and uploads it with a unique timestamp as part of the name. The result is a folder full of images taken every five minutes, 24 hours a day, 7 days a week.
At the end of the project, I’ll do some serious editing and probably eliminate the nighttime hours and weekends when there is nothing to see, but for now, I’m just posting daily time-lapses of the previous day’s activity. To accomplish this, I installed mencoder on my server and created a PHP to hit it like so:
date_default_timezone_set('Pacific/Honolulu');

$yesterday = date('Ymd');
SE("../mencoder mf://livecam".$yesterday."*.jpg -ovc lavc -lavcopts vcodec=flv:vqscale=10:keyint=4 -mf type=jpeg:fps=24 -oac copy -of lavf -lavfopts format=flv -vf scale=620:465 -o timelapse.flv");
(replace SE with "shell_exec"... I had to remove it because mod_security wouldn't let me save this WordPress post with that command in there)
I run the script at 12:05am every night, and the first line is a hack to make sure it encodes the previous day’s files instead of the current day’s (it’s yesterday in Hawaii at that time). The script outputs an .flv file for playback in the Flash player. You’ll need to export a .swf with the standard .flv playback component to get it playing in a browser. Otherwise, feel free to tweak the script so that it outputs to .mov, .mp4, .avi, or any other format. Fair warning though: the mencoder manual is a gigantic clusterfuck of settings that it can take a Unix rocket scientist to figure out. Hopefully I’ve done most of the work for you with the settings above.
Problems with my setup
The biggest problem with my setup is that I’ve had to drive to the site and manually reboot the camera twice now. It’s now set up to reboot itself at 6am every morning (via the internal software) so hopefully that solves the manual reboot problem, but it’s a little disheartening that a “network security cam” doesn’t have the power to self-heal itself automatically no matter what the circumstance. I’ve heard Axis cams are better at this.
The other problem is that my DSL provider has me on a dynamic IP. The camera uses DDNS so recovers from an IP change within 10 minutes, but even though the FTPing goes on uninterrupted, the streams can be interrupted multiple times a day if Qwest keeps changing my IP. Kind of a bummer. I might buck up for a static IP eventually… we’ll see.
The only other problem with my setup is that I obviously don’t have the multi-megapixel clarity that a still camera would provide. Since the daily entertainment of watching the live stream outweighs the lack of crystal clarity, however, I’m cool with the tradeoff.
So there you have it: how to set up a reasonably good quality, highly entertaining time-lapse of your construction project. If anyone has any more tips, please post them in the comments!
Costs accrued during this stage:
| Network camera and PoE injector | $522.00 |
| DSL Modem and 10 months of DSL service | $450.00 |