Archive for June, 2010 —

The new awning and front stairs are complete

We’re in hopefully the last week of work right now, as various punchlist items get taken care of and we get ready to move in. One item I discussed several weeks ago in “Offing the Awning” was the poor appearance of the front canopy. I’m happy to say that this has now been successfully resolved and we have a beautiful new canopy in front which ties in much more tightly to the overall design of the house:

The fir from the canopy, door, and stairs now tie together beautifully.

The puck lighting underneath the canopy provides just the right amount of light to illuminate the wood.

The fir stairs provide a warm entrance and the aluminum underneath offers a minimalist support structure.

Overall, I’m extremely happy with the finished product. This is one of a handful of items we pushed back on very hard from a design standpoint, and although it felt stressful and unsatisfying at the time, I’m really glad we insisted on this refined approach. It cost me a few thousand dollars in the end, but since we’re still using the steel frame of the original canopy inside of the aluminum/fir casing, it’s still providing some value. UPDATE: Kevin from Build pointed out to me that although the finished cost of the canopy is more than originally spec’d, not a penny of the cost was actually wasted due to the fact that the steel frame is simply acting as the skeleton now. Fair point.

Not to be overlooked, the fir stairs are also the result of pushing back against a proposed solution (steel) that we never got comfortable with. The lesson for this phase of the project is: if you aren’t comfortable with a certain material, insist that it be eliminated as an option early on. Occasionally you will be pleasantly surprised by such things, but more often, you know your tastes better than anyone else does.

Costs accrued during this stage:

Front canopy fabrication (Twisted Metalworks)$1,000.00
Galvanize front canopy (Scott Galvanizing)$416.00
Aluminum for redone canopy (Alaskan Copper & Brass)$687.00
Aluminum anodizing for redone canopy (Hytek Finishes)$300.00
Delivery of anodized aluminum for redone canopy (Pacific Delivery)$130.00
Delivery charges (Pacific Delivery Service)$352.00
Miscellaneous materials (Compton Lumber)$1,198.00
Aluminum fabrication for redone canopy (Special Projects Division)$832.00

The concrete floor saga

This is a post several months in the making. I’m only able to write about it now because it’s officially resolved and I’m satisfied with who I should name, who I shouldn’t name, and what the costs have been to me as a homeowner. As I’ve mentioned before on this blog, I’m very careful about naming subcontractors on this site because Google search results have the ability to make or break someone’s business, depending on what is written about them.

I have three categories I put subcontractors in:

  • Did a great job, would recommend. So far, almost everyone has fit into this category. If you do a great job, charge me a reasonable fee, and are someone I’d recommend to others, I write about you here and link to your site if you have one. Hopefully this leads to more business for you. My landscape person, Alex at Alexandria’s Creations, recently told me she’s gotten a several new clients from this site, and I haven’t even written the final glowing post on the landscaping yet.
  • Things didn’t go well for one reason or another, but the person was honest and tried to make it right. In this situation, I write about the process but keep the contractor’s name out of it. Only a few subcontractors so far have fit into this category. If I wrote about the entire process and named the company, it would have the effect of casting the company/person in a negative light, and I do not wish to do this. If you are honest and tried to make things right, you shouldn’t be subject to a full writeup about everything you did wrong.
  • Things were a disaster and I want to publicly warn readers to stay away. Nobody has fit into this category yet, but there have been a couple of situations where the final resolution saved someone from this group and put them in the previous group.

I don’t tell any workers about this system and I’ve never used it as an overt incentive/threat in order to get anything done. Not a single time. If you’re working on my house and you happen to find out about this site, you can draw your own conclusions as to how you may show up on it, but in most cases, people don’t even know about it until they get referrals weeks or months later.

Ok, now that that’s out of the way, on to the concrete floors…

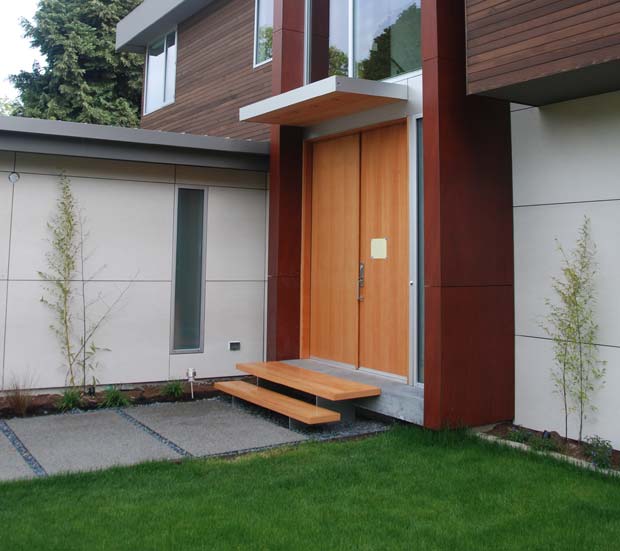
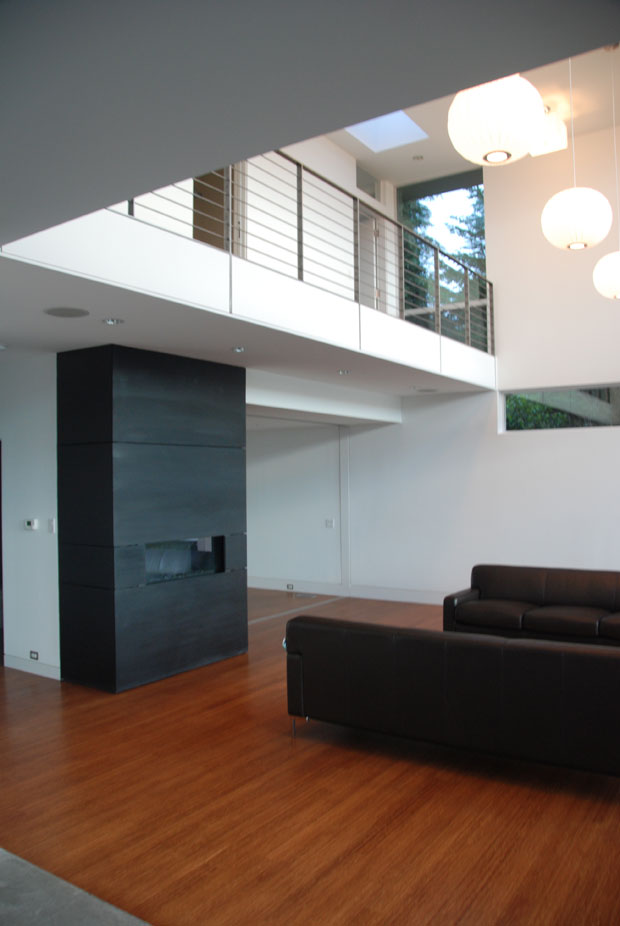
In planning the “grand entrance” for the house, we had a lot of choices: bamboo to match the floors, concrete to tie in with the steel, slate to keep things affordable, and linoleum to completely ruin the entire project if we so desired.

We liked the idea of concrete the best, but because of the existing subfloor elevations and some weight issues, we couldn’t do a full, thick poured concrete floor. We were turned onto a product, however, that’s been around for quite awhile now called a “concrete terrazzo overlay” or “decorative concrete overlay” floor. It’s essentially a poured floor made of concrete and aggregate but is only an inch and a half or so thick. It was about the most expensive option available at about $9,500 for 400 square feet. This cost included in-floor heat, but it was still probably twice the cost of something like slate. Nevertheless, it was a very public part of the house, so we went for it.

Around the beginning of February, work started on pouring the floor. It was only supposed to take a week or so, including the 7-step polishing process, but it ended up taking about 2.5 weeks. A loud, dusty 2.5 weeks. When the grinding and polishing was almost done, I noticed several cracks across the floor, some of them pretty major. Concrete workers always warn you that you should expect a few cracks when you choose concrete as a floor option, but given the fact that the thing wasn’t even fully installed yet, I freaked out a little. The company tried to fix one of the cracks and it seemed to make things worse.

I wasn’t feeling very good about things at this point, but we couldn’t hold up the rest of the construction and needed to cover up the floor with protection for the next few months as other work continued. Given the fact that the company needed to come back towards the end of the project anyway to do the final polishing, the decision was made to just deal with it then (incidentally, I don’t recommend doing this… deal with everything at the time, if you can).

Well, a few months went by, we completed most of the rest of the house, and it was time to uncover the floor and bring it up to snuff. To our surprise and dismay, there were now over 20 cracks in the floor. Mind you, none of these cracks were concerning from a structural standpoint as they were all hairline in size, but to have your brand new concrete floor dominated by very visible and ugly cracks is disappointing to say the least. We called the owner of the company in to have a look and were a bit worried he’d say this was “completely normal”, but even he agreed this was out of ordinary and not something he anticipated.

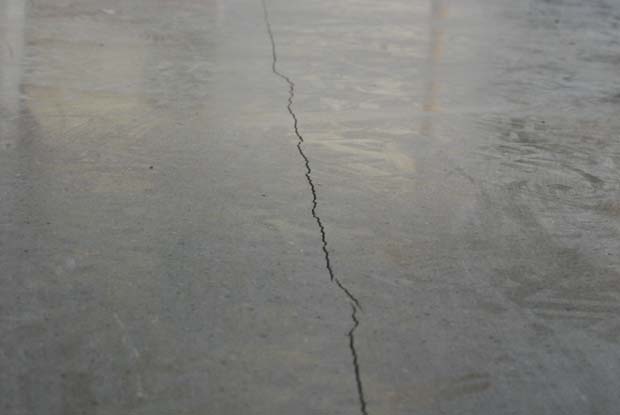
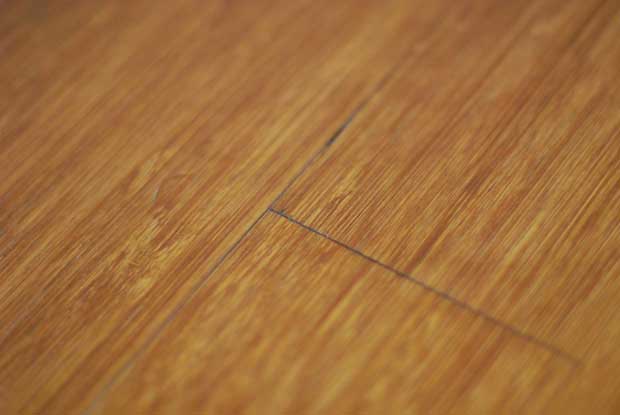
One of the approximately 20 cracks. This was the worst one.

We had two options: try to fill the cracks with color-matched grout or grind the whole thing down and do something else on top of it (like more of this product or maybe ultra-thin slate tile). The decision was made to try the grout option first as it had the least project/cost impact. Unfortunately the grout ended up making the cracks even more conspicuous.

At this point, we called the company back and expressed our disappointment with the grout fix. The company did not immediately return our e-mails so we prepared ourselves for a situation where they would walk away from the project (I had paid them about $8000 so far and still owed about $1500).

Build recommended we call a company they’d used before called Cirvell that uses a product called Milestone, which is essentially hybridized portland cement. The product has a “hand-troweled” look and isn’t as “shiny and pristine” looking as the concrete terrazzo overlay, but at only a sixteenth of an inch in thickness, it could be troweled on top of the existing floor with no grinding whatsoever.

We informed the original concrete floor company that we were proceeding with the Milestone option and that we felt a refund of half of the fees paid so far was a fair arrangement for both parties. This would leave me paying $4000 for a heated concrete subfloor, plus $2500 for the Milestone coat. To his credit, the owner of the original concrete company sent us a check for $4000 and we’ve now parted ways, sadly but amicably.

Although I was obviously not happy with the concrete terrazzo floor, the way the company owner handled the refund showed me he was an honest guy and someone who cared about the quality of the product and service he was providing. He could have easily just walked away and stuck me with the bill, but making things as close to “right” as possible was important to him, and that is why I’m not interested in steering readers away from his product. He’s no doubt done hundreds of successful floors… just not mine, and for we know, there was something about the construction, or temperature, or humidity in this job which conspired to not let the product cure correctly.

Thankfully, the folks at Cirvell were able to give us an end result which we’re quite happy with. They completed their work in only a few days, for a reasonable cost, and have graciously offered to come in and fine-tune the tint of the floor after we move in, if we desire. I do not hesitate to recommend them if you’re looking at Milestone as an option in your own home.

Here’s what the finished product looks like now. Plus one for Milestone.

… and with that, the concrete saga is thankfully resolved. For more photos of the floor, please visit the photo gallery.

Costs accrued during this stage:

Concrete terrazzo floor$4,159.00
Milestone overlay (Cirvell)$2,500.00

Security systems and move-in day

Tomorrow is move-in day, and what better time to talk about security systems, since there will actually be possessions in the house for the first time.

Security is kind of a tough thing to blog about since the more I publish about my setup, the easier it would be for miscreants to subvert it. I’m sure everyone reading this blog on a regular basis is an honest member of society, but you never know who might come in through Google one day. So… for that reason, I must say very little. What I will say is this though: I’m going to lay out a few details in this post about how we secure the house and then I’ll do a separate, more comprehensive post on all the great home automation we’ve built in.

To start off with, we have contact sensors on every single opening in the house. Doors, windows, sliders, Nanas, garage door… you name it. When any perimeter orifice is opened, the central alarm/automation system knows about it. This is not only useful for security but also for doing cool things like turning on lights when doors are opened.

The second layer of protection is glass breakage sensors. We have these all over the house. They work by detecting the audio frequency emitted when glass is broken. If any window in the house breaks, the alarm/automation system knows about it.

The third layer of protection is motion sensors. As the name suggests, these trigger when they detect movement in the house. Some people choose to keep these on only when the house is empty and some people have certain zones on all the time. These are also useful for doing things like automatically turning on the stair lights when you’re about to walk up or down stairs.

We also have a siren on each floor and one on the roof for maximum ear piercing delight. When the alarm triggers, a monitoring service is alerted as well as a few cell phones including mine.

There’s a bit more to it than this even, but we’ll just leave it at that for now. I will say this: if you’re building a house, do not skimp on wiring, whether it’s alarm wiring or data. It’s very tempting to ask yourself “do I really need a sensor here?”, but spend the extra few bucks and run every single wire you could possibly need. You won’t regret it. Most of these sensors are less than $20 apiece (for top of the line, great ones even!) so all you’re really paying for is your wiring guy’s labor. Well worth it.

Do not worry about overwiring. Do worry about underwiring.

I’m really looking forward to move-in day tomorrow. There are several more big posts coming including the hardwoods, the landscaping, the kitchen, and the bathrooms.

UPDATE: Nina in the comments reminded me about cameras. I totally forgot to mention those. We have several infrared, high resolution, night-vision cameras which monitor almost every angle of the house 24 hours a day. The footage is available live via a streaming server as well as recorded via a dedicated DVR. Everything is also on battery backup in case of a power failure.

The bamboo floor saga

A couple of weeks ago, I posted about the concrete floor saga. Unfortunately, this wasn’t the only “adventure” related to the flooring throughout the house. The whole bamboo situation was arguably even more stressful. I’ll start from the beginning.

In deciding what sort of wood to use on our floors, the girlfriend and I both dug bamboo for its modern, natural appearance and its sustainability (bamboo is actually a grass and not a wood). We would have been perfectly fine with a nice durable hardwood like brazilian cherry but bamboo was the first choice. In researching bamboo, the first thing we discovered was the janka scale. The janka scale measures the hardness of wood and is the primary indicator of how easily your floors will dent. I have a friend with a cheap, engineered bamboo floor and he swears he can dent the thing just by dropping his keys on it. This cheap bamboo is likely in the 1100-1200 janka range and is super-thin as well, making it a poor candidate for durable flooring.

On the other end of the scale is strand woven bamboo. Weighing in at 3000 or more on the janka scale, only a few woods are harder. Strand bamboo has a distinctive look to it that you may or may not be into, but it’s virtually indestructible, so we specified it.

The first misstep in the bamboo saga occurred here.

The wrong bamboo was ordered. Instead of receiving strand bamboo, we received Teragren Signature Naturals vertical grain caramelized bamboo in 3/4 inch thickness. While the non-caramelized variety averages a healthy 1876 janka, the caramelized version is about 30% softer (caramelizing or “carbonizing” is the process of cooking bamboo so that it darkens naturally, the side effect being that it softens). Since the bamboo looked really nice and was a from Teragren, a company known for its quality, we decided to see if we could just exchange the caramelized stuff for non-caramelized.

The distributor agreed to make the exchange and we then accepted a new shipment of non-caramelized bamboo, which we’d just darken via staining. The color we were going for was slightly darker than natural blonde bamboo; a color sometimes referred to as “honey”.

Here is when the real (non) fun started.

When the company doing our floors laid the first coat of stain down, the edges of each floor board collected stain in a manner inconsistent with the faces of the planks. The result was a light colored floor (good) with dark outlines around each board (terrible). One of the many reasons we went with a site-finished floor instead of a pre-finished floor was so the floor would be one even, seamless, gapless piece of awesomeness.

A close-up of the darkness between boards. The inital stain was much lighter than this so you can see how these seams would ruin the appearance.

The flooring company, recognizing the problem, offered to re-sand the whole floor and lay down a different treatment. Unfortunately, however, every attempt to slightly darken the floor resulted in these unsightly outlines around the boards.

I then began calling around to other flooring companies, including a very highly regarded one on Bainbridge Island, and to my surprise, some companies told me they refuse to stain bamboo for this very reason. Apparently, stain does not take evenly to bamboo and getting it to look right is more trouble than it’s worth.

Would have been great to know ahead of time! Especially from the flooring installer!

Faced with this new information, we had two choices: keep the floor blonde or stain it much darker so the dark spots between the boards would blend in. We ended up choosing the latter.

Unfortunately the fun didn’t end there either.

When the stain went down, we were actually pleasantly surprised with the look. It was more or less the color of teak, which is kind of original for a bamboo floor. When it dried the following day, the entire floor had to be covered up with protection so the rest of construction could continue (much like with the concrete floor). I noticed what I thought were some shoeprints around the edges of the walls, but since the flooring company had to come back in a few months to do the topcoat, I figured it would get fixed at that time.

When the construction started wrapping up a few months later, the flooring company came back out to put a swedish finish top coat on. Unfortunately, not only did they coat over the shoeprints, but they actually weren’t shoeprints. Turns out they were “chattermarks” and they were all around the perimeter of the main floor. Chattermarks are essentially scratches in the surface caused by subpar sanding. The stain from the bamboo collected inside the scratches and that’s why they looked like shoeprints.

When I complained, the flooring company came back out and tried to repair the situation using some floor tint, but it only made things worse. Although I hate making people redo work, the owner of the company agreed that this was not up to his company’s quality standards and that they would re-sand the entire floor again and make things right.

Although it ended up adding another week or so to the construction schedule, the floor was re-sanded and the situation was resolved. We now have a beautiful, teak-colored, site-finished bamboo floor, that should be hard enough to withstand thousands of key drops and other accidents.

The finished floor looks really great, and although it was a long process, it turned out beautiful.

Lessons learned

  • If you choose a bamboo floor, either stain it dark or don’t stain it at all. Plenty of colors are available if you go pre-finished, but site-finished floors are generally regarded as higher quality. If you are looking at strand bamboo, the two best samples I found were from Plyboo and Duro Design.
  • Investigate the janka rating of whatever material you’re thinking about and choose something above 1500 unless you don’t care about denting.
  • Quiz your flooring company and find out if they’ve ever worked with the product you’ve chosen. If I had known the company doing my floors had never stained bamboo before, I would have either chosen a different product or a different flooring company. Companies may not volunteer that they’ve never worked with a certain product before because they assume it’s not much different than what they’re used to.
  • Just like with the concrete floor situation, let your installer know right away if you’re not happy with something about their installation. You may still both agree to deal with it at a later date when construction schedules permit, but get it on their radar and hold back an appropriate percentage of payment until it is dealt with.

Costs accrued during this stage:

Bamboo flooring (parts and labor)$23,146.00

Getting comfortable

Now that the house is done and we’re all moved in, I thought I’d write a short post about how the first couple of weeks have gone. Since I haven’t lived in anything but apartments and condos since going off to college, it’s been a bit strange expanding into a much larger space.

The strangest part isn’t really the size, but rather the amount of “things” to keep track of… especially entrances and exits. In a condo, your only point of security is your one main door so remembering to close and lock it isn’t difficult. Additionally, unless you’re on the ground floor, any windows you may leave open are not much of a security risk. Yes, we have a security system to tell us when these sorts of things are open, but it’s still another thing to keep track of. We also have an indoor cat and there are quite a few neighborhood outdoor cats that hang out in our backyard, so making sure those boundaries are not crossed is another concern.

Another thing that was unexpected for me with new construction is how many post move-in tweaks and fixes there are. It’s definitely not like buying a new piece of precision electronics that’s been thoroughly tested and should be flawless right off of the assembly line. New homes are imperfect. They just are. Until people begin living in them, many of their flaws go undetected. Some examples in my situation include a shower with a defective thermostatic valve, pocket doors which don’t have the proper clearance to slide unencumbered, and a built-in dresser that isn’t tall enough to hang certain garments.

I won’t lie… at first, it’s a bit frustrating seeing these sorts of things right after you move in. You’d like to think a large team of professional “testers” came through your house before you moved in to flip every switch and jiggle every bolt, but unless you hired that team specifically, it is likely they didn’t. Builders do the best they can to present as finished of a product as possible, but as a homeowner, you’re always going to find things they don’t. This is no different than my business, where we produce web experiences we think are great only to have our clients and our customers point out things we didn’t do right.

The other important part of getting settled that we haven’t completed yet is just getting everything functional and into place. TV, internet, and whole-house audio are all working now, so that helps, and we have some nice new furniture as well, but a house feels empty without art, plants, and some of the other human touches people adorn their surroundings with.

I still have probably 10 or 15 more posts to write on some subjects I haven’t covered yet, but until then, feel free to visit the photo gallery for some new shots of the completed house. Build also has a new post on the completion of the house.