Archive for the ‘Technology’ Category

Guiding the Design Process with SketchUp

The 3D Connexion Space Navigator

I’ve mentioned Google SketchUp before as the only 3D modeling application I could wrap my brain around. Even as a professional designer who has used Photoshop, Illustrator, and a host of other applications for over 10 years, all other 3D and CAD programs are just way too complicated for me.

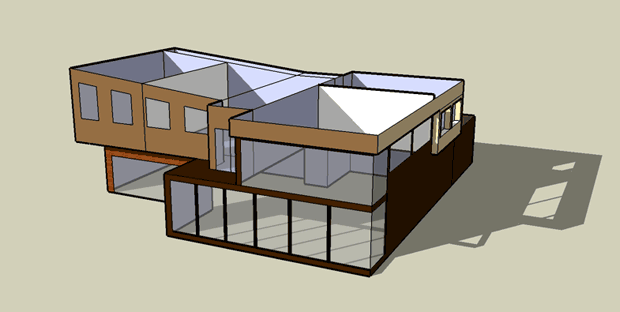
The great thing about SketchUp — besides the fact that you can learn it in a day or two — is that it helps you figure out in your own mind what you want your new home to look like and produces great models that you can e-mail to your architects for guidance. I’ve never had a problem expressing myself with words, but when I met with my architects a couple of weeks ago to go over pre-design concepts, I found myself sketching clumsily on vellum paper and trying to artfully explain in words what could be expressed in about five seconds with a 3D mockup. After the meeting, I went home, spent a couple of hours in SketchUp, and produced the following model:

A view of the back of the house. This would be the side facing Puget Sound.

Is it pretty? Nope. But it illustrates several important concepts I wanted to get across:

  • Double-height great room on the south side
  • Nana Wall on the northwest side connecting the dining room to the deck
  • General bedroom arrangement with a deck facing northwest from the master
  • Plenty of glass
  • Stained wood siding but only used sparingly

None of these things are meant to prescribe exactly what the house will look like, but it’s invaluable to be able to put something like this in front of your architects with only a few hours worth of work. I have another meeting with them tomorrow and they could either match the model closely or go off in another direction entirely and either could work out great, but with this model, I can at least compare their solution(s) with something that I think would work for me. I made sure to tell them not to take any style cues of the admittedly rudimentary model, but only general layout cues. We’ll see what happens. I’m excited.

While we’re talking about SketchUp, I thought I’d mention a SketchUp companion product you might want to purchase if you plan on spending a lot of time in the program. It’s called the 3D Connexion Space Navigator and it’s essentially a three-dimensional mouse which lets you zoom, pan, rotate, and orbit your model by moving your hand in a three-dimensional motion. It’s bizarrely effective and it saves you from having to constantly switch between tools in SketchUp just to view your model from the right perspective for the task you’re working on. The thing is as heavy as a large paperweight, which is necessary because in order to pan up, you actually pull up vertically on the device, and to zoom out, you push it away from you. If it was light, it would move all over your desk, but since it’s so heavy, it stays in place as you exert light amounts of force on it. Really, really cool. I got mine at Amazon.com for $57.97 including shipping and tax. Props to my buddy Danny over at Mavromatic for suggesting this.

Costs accrued during this stage:

3D Connexion Space Navigator 3D Mouse$57.00

Rethinking Natural Wood Siding

While waiting patiently for the construction permits to get issued, I’ve been thinking really hard about the ramifications of using natural stained wood on heavily exposed areas of my house. It’s been a concern of mine from the very beginning, but only after seeing in person what happens to Brazilian Ipe after a year in the sun and rain have I started to really question whether or not I want so much exposed wood on the outside of my house. Ipe is such a dense wood that you aren’t even supposed to stain it, but in order to keep it from silvering, you pretty much need to oil it down every year. Considering that part of this wood will be inside and part will be outside, I’m just not convinced I can maintain anything close to a uniform, “newish” appearance no matter what I do (and I don’t want to oil or stain a good portion of the house every year).

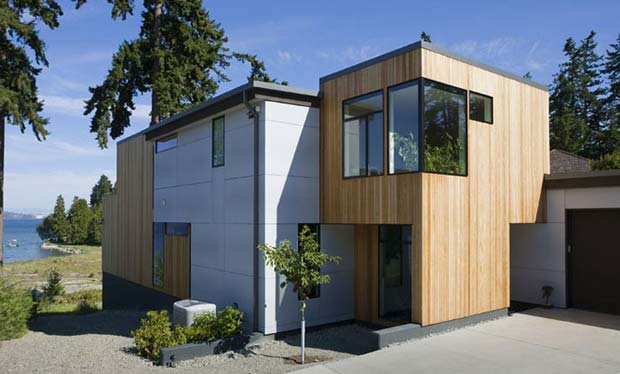
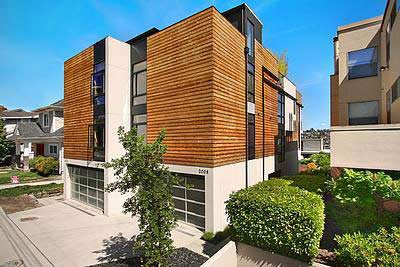
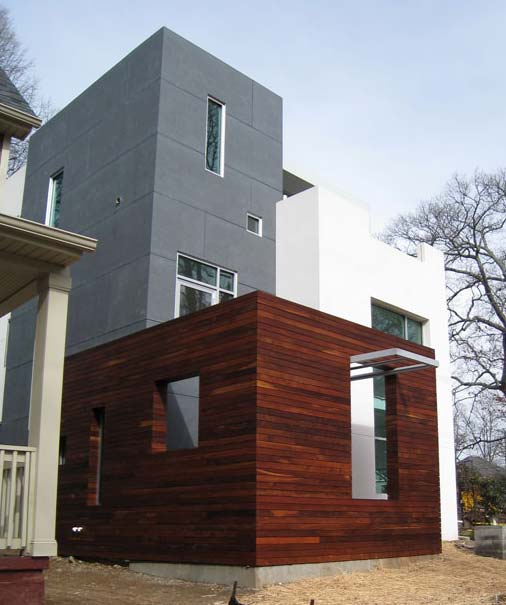
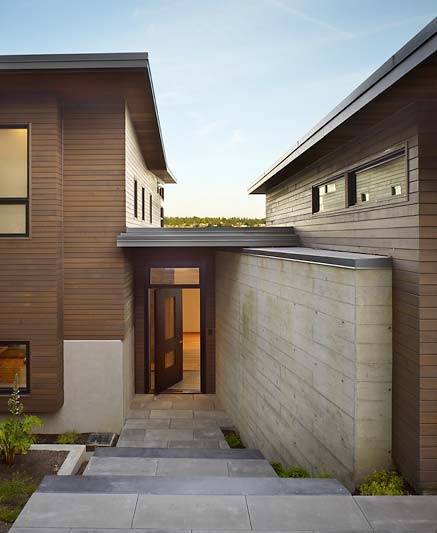
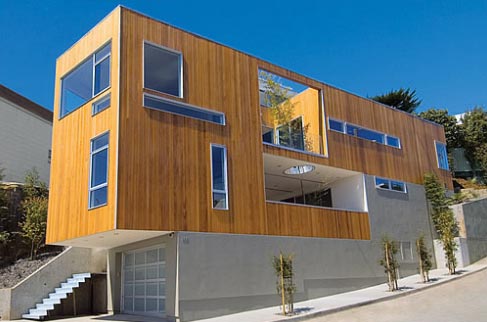
This concern seems to fly in the face of a lot of modern architecture lately, especially in the Pacific Northwest. Take a look at some really nice wood-heavy modern designs from the last few years:

Build LLC

PB Elemental

Scott West

SkB Architects

Unknown

While all of these houses look spectacular, I just can’t help but wonder what they will look like in 5 or 10 years, especially in a climate like Seattle that gets quite a wide range of weather. From what I can tell, it’s the sun more than the water which makes wood fade or go silver, so maybe in that sense, Seattle isn’t so bad.

Because of my concerns, I’ve been exploring alternatives including the following:

  1. Using another wood like mahogany or cedar, which may be easier to stain when it starts to fade
  2. Painting the wood from the get-go, or at least being ready to paint it if and when its appearance goes downhill
  3. Using a synthetic wood paneling system which should hold up indefinitely to the elements
  4. Using a plastic-aluminum cladding system and tucking a bit of wood accenting in sheltered areas of it

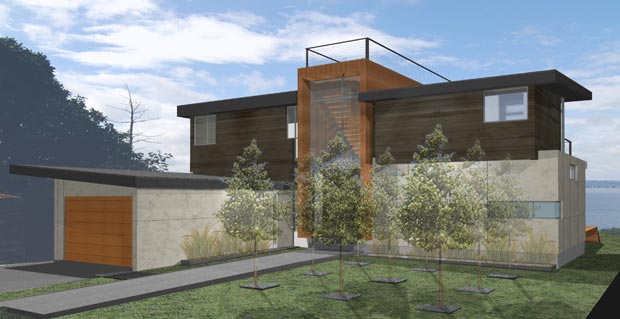
If anyone has any experience that could be helpful, I’d love to hear it. Once again, here is the mostly-final design we’re talking about:

Design inspiration and other helpful resources

Over the past several months, I’ve built up a pretty decent list of home-design related RSS feeds. If you’re interested in keeping up on the latest home design trends, appliance technology, and related issues, add the below feeds to your Google Reader subscriptions. The best way I’ve found to clip things I like is to use Tumblr. I basically just set up a Tumblr blog at http://tumblelog.ahousebythepark.com where everything is saved, and there, my architects can keep tabs on things I’m looking at.

Anybody have any other great feeds to add to the list?

The Live Cam is Now Live!

I’ll have a more complete post on this later, but the live construction cam is now live. The house is coming down! Click here for the latest image (the image will update every minute).

It’s going quick…

Setting up the construction time-lapse

Time-lapse photography is a great way to document a construction project. Setting up a proper time-lapse requires you to answer a few questions before you can get started:

  1. What are your available locations to mount a camera?
  2. What are you connectivity options?
  3. What are your power options?
  4. What are your image quality requirements?
  5. Do you want video monitoring as well?
  6. What are you willing to spend?

Locations

There are really only two choices when it comes to location: either mount a pole somewhere on your property or find a kind neighbor willing to let you put your camera on their property. Mounting a pole would have been a difficult option for me because it would have taken time/effort/expense and it didn’t solve my internet connectivity problem. I could have probably run power to the pole but then I’d have to either rely on a flaky wireless internet connection or build some sort of temporary enclosure for a modem. Not impossible, but not ideal for my purposes.

Luckily, my across-the-street neighbors were nice enough to let me mount a small camera underneath their carport roof, which provided a great viewing angle for the construction and potentially a direct connection to the internet. My neighbors have cable internet, so in order to get me on a completely separate network from them, they ordered a DSL line, which I pre-paid them a year’s service for. The DSL modem has wireless access, but since I needed to power my camera anyway, I planned on buying one that had PoE (power-over-ethernet) built in; that way, one ethernet cord was all that would need to tether the camera.

Connectivity

As mentioned, I went the DSL-from-neighbor’s-house route, but there are many other options to consider. If you have many open wireless networks with strong signals around your property, you can try to mooch off one of those. Or you can offer to pay a portion of a neighbor’s internet bill during construction in exchange for getting access to their network (this is what I originally proposed to my neighbor). Another option is to purchase your own cable or DSL connection and build a waterproof shelter for it somewhere on site.

Other less-than-stellar options include procuring a computer that can accept a Clearwire (WiMax) card and using that for your connection, or using an SD card in your camera and manually transferring images every week or so. There is an SD card called the EyeFi which has built-in wireless transmission but as of the date of this blog entry, it’s missing one critical feature: the ability to delete images after they have been uploaded. Without this feature, the card can fill up even as you are successfully posting your images online.

Power

Power-over-ethernet is really the ideal way to give your device the juice it needs to operate because it kills two birds with one stone: the power and the connectivity. Note that in order for PoE to work, you’ll need a $30 device called a PoE injector which sits between your router and your camera, plugs right into an AC wall outlet, and runs a trickle of power down the ethernet line.

If you can’t do PoE (or if you’re doing it on your property), you can hook up power through the temporary power strike that will be set up on your site.

I looked briefly at battery-based options for powering video cameras and none looked too promising. All were large, expensive, and still obviously required recharging. The only way I’d consider running battery power for a project like this is if I was using a still camera and was cool with swapping a new battery in manually every couple of weeks.

Image quality

There are a few levels of image quality you can achieve in a time-lapse project: 640×480 “security cam quality”, megapixel “web cam quality”, hi-res point-and-shoot quality, or high-res DSLR quality.

The first thing to decide is whether or not you require video streaming capabilities. I didn’t think I did at first and only wanted high quality stills, but after watching my demolition streamed live last week, I am extremely happy I went for the video option. It’s a great way to keep a close eye on the construction site as well.

If you require video streaming, both the point-and-shoot and DSLR options are unfortunately out. To stream video, you need a device with a streaming server embedded in it (or at least the ability to stream it out to a computer over USB), and I’m not aware of any still cameras with this capability.

If you don’t require video streaming, go with a point-and-shoot with a built-in intervalometer or a DSLR that can be attached to an intervalometer. For a great overview of this type of time-lapse project, check out Photojojo’s guide. I also found a site a couple of months ago that listed a ton of cameras with built-in intervalometers but now I can’t find it. If you happen to find it, please post a link in the comments.

Video monitoring

If you’ve decided you want video monitoring capabilities, you’re pretty much limited to 640×480 security camera quality (low) or megapixel webcam quality (better, but not great). Although the megapixel cameras are more expensive, I highly recommend going with one. 640×480 is just too low of a resolution to get a clear picture from.

Axis cams are generally regarded as the gold standard, but the really good megapixel models run upwards of $1000. I went with the Panasonic BB-HCM515A which is about half that price and have been reasonably happy with the results so far. It’s officially an indoor camera, so I’m rolling the dice a bit, but it’s sheltered from the rain so I’m thinking it should be fine.

Price

You can spend anywhere from $50 to about $4000 on your setup, so what you buy depends on your budget. My goal was to keep the project under $1000, including internet connectivity charges.

My particular setup

One of the nice things about the Panasonic is that it has a full web server built into it, with the ability to stream live video to both my computer and my iPhone as well as the ability to automatically FTP still images to my server at any interval I choose. I can also pan and tilt the camera remotely from any web browser as well as give guest access to the stream to friends.
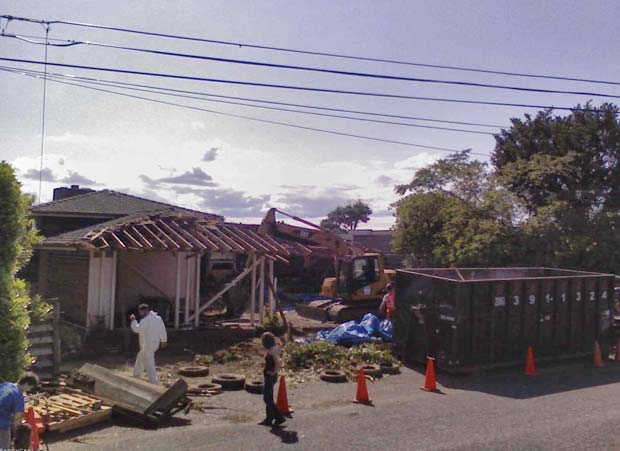
Here’s a nice shot of a crew member dancing for a spectator. Tiffehr happened to catch this while watching the stream.

Via the built-in software, I have the camera set to FTP one image every 60 seconds to my server and overwrite the previous one. That image is displayed on the Live Cam page. Additionally, the camera snaps another shot every 5 minutes and uploads it with a unique timestamp as part of the name. The result is a folder full of images taken every five minutes, 24 hours a day, 7 days a week.

At the end of the project, I’ll do some serious editing and probably eliminate the nighttime hours and weekends when there is nothing to see, but for now, I’m just posting daily time-lapses of the previous day’s activity. To accomplish this, I installed mencoder on my server and created a PHP to hit it like so:


date_default_timezone_set('Pacific/Honolulu');
$yesterday = date('Ymd');

SE("../mencoder mf://livecam".$yesterday."*.jpg -ovc lavc -lavcopts vcodec=flv:vqscale=10:keyint=4 -mf type=jpeg:fps=24 -oac copy -of lavf -lavfopts format=flv -vf scale=620:465 -o timelapse.flv");

(replace SE with "shell_exec"... I had to remove it because mod_security wouldn't let me save this WordPress post with that command in there)

I run the script at 12:05am every night, and the first line is a hack to make sure it encodes the previous day’s files instead of the current day’s (it’s yesterday in Hawaii at that time). The script outputs an .flv file for playback in the Flash player. You’ll need to export a .swf with the standard .flv playback component to get it playing in a browser. Otherwise, feel free to tweak the script so that it outputs to .mov, .mp4, .avi, or any other format. Fair warning though: the mencoder manual is a gigantic clusterfuck of settings that it can take a Unix rocket scientist to figure out. Hopefully I’ve done most of the work for you with the settings above.

Problems with my setup

The biggest problem with my setup is that I’ve had to drive to the site and manually reboot the camera twice now. It’s now set up to reboot itself at 6am every morning (via the internal software) so hopefully that solves the manual reboot problem, but it’s a little disheartening that a “network security cam” doesn’t have the power to self-heal itself automatically no matter what the circumstance. I’ve heard Axis cams are better at this.

The other problem is that my DSL provider has me on a dynamic IP. The camera uses DDNS so recovers from an IP change within 10 minutes, but even though the FTPing goes on uninterrupted, the streams can be interrupted multiple times a day if Qwest keeps changing my IP. Kind of a bummer. I might buck up for a static IP eventually… we’ll see.

The only other problem with my setup is that I obviously don’t have the multi-megapixel clarity that a still camera would provide. Since the daily entertainment of watching the live stream outweighs the lack of crystal clarity, however, I’m cool with the tradeoff.

So there you have it: how to set up a reasonably good quality, highly entertaining time-lapse of your construction project. If anyone has any more tips, please post them in the comments!

Costs accrued during this stage:

Network camera and PoE injector$522.00
DSL Modem and 10 months of DSL service$450.00

Framing in-progress. Photo gallery is live.

Just getting caught up on the last few blog posts worth of progress… sorry for the backdating on the last couple of entries.

Framing began a few weeks ago and it’s going QUICK. I’ll have a full post on the framing process next, but for now, feel free to check out the proper photo gallery of the entire project I posted last night. The gallery provides much better imagery and angles than the webcam, obviously, and I’ll update it as often as I can. It’s available via the left-hand navigation of this site as well.

I’m thinking about adding the photo galleries to the main RSS feed. Anybody have any thoughts on that? Good? Bad? Alternatively, I could just add the RSS feed of the gallery to the sidebar.

Getting wired

This is shaping up to be a pretty exciting week, with windows, Nana walls, and the metal roof all going in simultaneously. While there hasn’t been much to see on the livecam over the last month, action should pick up strongly today. The house should be more or less weatherproof by Friday!

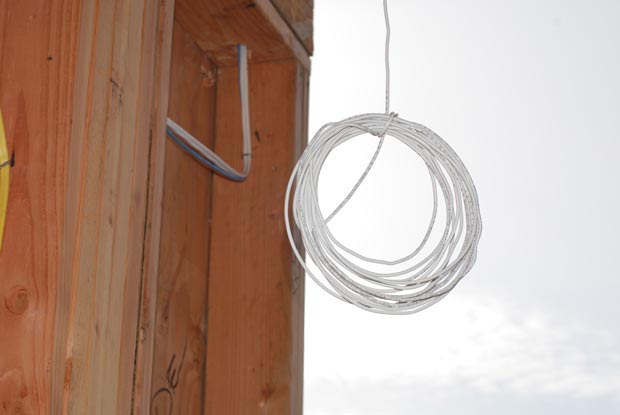
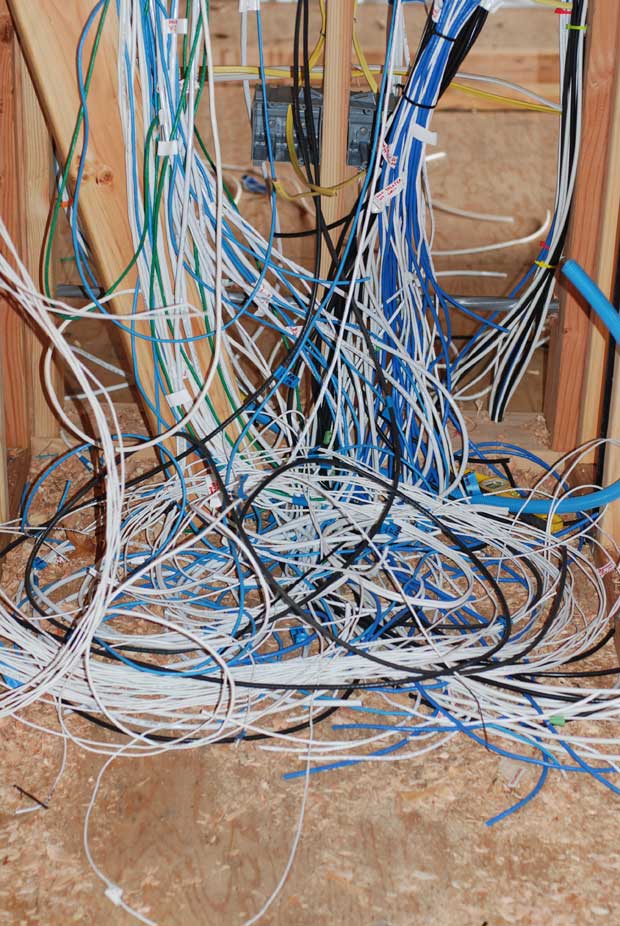
Meanwhile, one of the most interesting aspects of the house has been coming together over the last several weeks: the electrical rough-in. Wire by wire, Tom Bell and the team at Thomas Bell Electric have been outfitting every nook and cranny of the house with lighting cans and future-proof circuitry. Tom’s original contract was to just do lighting and high voltage work, but the crew has done such a good job — and at a reasonable price — that I’m having them do low voltage and security system wiring as well.

So, onto the details…

Data

There are a few options for dealing with your house’s internet/data connectivity these days: cat 5e cabling, cat 6 cabling, fiber, and wireless. Several years ago, cat 5e was the standard as it supports up to about 350 Mb/sec. Cat 6 is a bit faster and supports gigabit transfer rates, but the downside is that you can’t run your telephone connection through it, as you can with cat 5e Turns out you can! Thanks Karl!. Fiber is the fastest option, but it’s even more expensive and it’s debatable when it will provide a clear advantage over cat 6. Wireless is the easiest and cheapest option, and it’s what most people choose when remodeling or trying to otherwise retrofit a house without mucking around inside the walls. Wireless is currently plenty fast enough to handle everyday internet connectivity, but topping out at about 50 Mb/sec, it’s far below actual cabling. Wireless connections are also inherently less secure than hardwired connections.

In order to stay reasonably future-proof at an affordable cost, we went with one cat5e and one cat6 to almost every room in the house. Additionally, there will be enough wireless base stations around the house to get a signal wherever you happen to be (probably two).

wirecloset

I did not even have a wide enough angle lens to capture all of the wiring in the control closet. Here is a sample.

Video

For TV signals, the only game in town is still good old fashioned RG6 (coaxial) cabling. Cable TV providers only require one cable per TV/DVR while satellite providers require one cable per tuner (so you’d need to plug two cables into your DirecTV DVR in order for both tuners to operate). For this reason, we are running two RG6s to most rooms and four lines up to the roof in the likely case we go with satellite as the TV source. Note: apparently DirecTV now allows you to use one cable per DVR in their newer systems, but it’s still a good idea to have that extra jack.

Audio

Even though it seems a bit excessive to me, we are wiring almost every room in the house for sound. We’ve opted for the Russound CAM6.6 system with UNO-S2 keypads and mostly Russound Ratio speakers. I spec’d out 15 zones but we’re keeping it limited to 12 for now because for every 6 zones, you need to buy a new (expensive) controller.

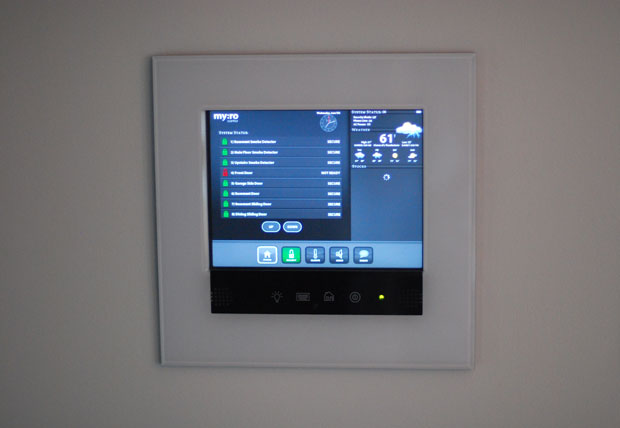
What’s nice about the Russound system is that it’s all controlled via IP, it sounds great, and it ties directly into the home automation setup we’re building around Myro (there will be a separate post on this shortly).

Security

I had a security company come out to the property and bid on installing an alarm system for the house, but the results were less than satisfactory. The company wanted a couple of thousand dollars to install everything but would only do it if I signed up for a 5 year monitoring agreement at $41 per month. That just seems really excessive to me, and I know monitoring can be had for as little as $8.95 a month elsewhere. That combined with the fact that the HAI Omnipro II I’m purchasing already has security capabilities built into it made this alarm company’s offer a no-go. Instead, I’m having Tom run all the security system wires and we’ll just hook everything into the Omnipro ourselves. Big thanks to my friend Danny Mavromatis (creator of Myro), for helping design all of this low voltage stuff and leading me through the maze of products necessary to make all of this happen. And of course, big thanks to Tom and the crew at Thomas Bell Electric for everything they’ve done over the last few weeks.

As you can probably guess, this is an item we’ve overshot our budget on by a substantial amount, but since everything else has come in on budget or below, it seems worth it. Wiring the basement wasn’t part of the original scope and neither was an extensive audio, security, and home automation system, so if this is the one phase we spend a little more money on, I’m ok with it. Technology is more important to me than expensive chandeliers, and it’s also a lot harder to “fix” after the fact, so getting it perfect at this stage is critical.

Costs accrued during this stage:

Electrical rough-in and installs$52,384.00
Honeybucket rental$117.00
Miscellaneous expenses$95.00

Architectural visualizations using holograms

As readers of this blog know, I’m a huge fan of photorealistic 3D modeling to aid the architectural design process. In the course of building this house, I had a idea for an invention which could potentially be even more useful than 3D renderings in some cases. I may end up pursuing it… we’ll see.

Via Freshome, however, comes this nifty piece of technology:

A holographic display to aid in the visualization of your new home. Very interesting stuff. It still doesn’t solve the spatial problems I’m looking to solve with my idea, but it’s interesting and potentially useful nonetheless. How much would I have paid for something like this during the design process? Probably only a grand or two. Seems useful though.

Security systems and move-in day

Tomorrow is move-in day, and what better time to talk about security systems, since there will actually be possessions in the house for the first time.

Security is kind of a tough thing to blog about since the more I publish about my setup, the easier it would be for miscreants to subvert it. I’m sure everyone reading this blog on a regular basis is an honest member of society, but you never know who might come in through Google one day. So… for that reason, I must say very little. What I will say is this though: I’m going to lay out a few details in this post about how we secure the house and then I’ll do a separate, more comprehensive post on all the great home automation we’ve built in.

To start off with, we have contact sensors on every single opening in the house. Doors, windows, sliders, Nanas, garage door… you name it. When any perimeter orifice is opened, the central alarm/automation system knows about it. This is not only useful for security but also for doing cool things like turning on lights when doors are opened.

The second layer of protection is glass breakage sensors. We have these all over the house. They work by detecting the audio frequency emitted when glass is broken. If any window in the house breaks, the alarm/automation system knows about it.

The third layer of protection is motion sensors. As the name suggests, these trigger when they detect movement in the house. Some people choose to keep these on only when the house is empty and some people have certain zones on all the time. These are also useful for doing things like automatically turning on the stair lights when you’re about to walk up or down stairs.

We also have a siren on each floor and one on the roof for maximum ear piercing delight. When the alarm triggers, a monitoring service is alerted as well as a few cell phones including mine.

There’s a bit more to it than this even, but we’ll just leave it at that for now. I will say this: if you’re building a house, do not skimp on wiring, whether it’s alarm wiring or data. It’s very tempting to ask yourself “do I really need a sensor here?”, but spend the extra few bucks and run every single wire you could possibly need. You won’t regret it. Most of these sensors are less than $20 apiece (for top of the line, great ones even!) so all you’re really paying for is your wiring guy’s labor. Well worth it.

Do not worry about overwiring. Do worry about underwiring.

I’m really looking forward to move-in day tomorrow. There are several more big posts coming including the hardwoods, the landscaping, the kitchen, and the bathrooms.

UPDATE: Nina in the comments reminded me about cameras. I totally forgot to mention those. We have several infrared, high resolution, night-vision cameras which monitor almost every angle of the house 24 hours a day. The footage is available live via a streaming server as well as recorded via a dedicated DVR. Everything is also on battery backup in case of a power failure.

Mitigating Solar Gain with Motorized Shades

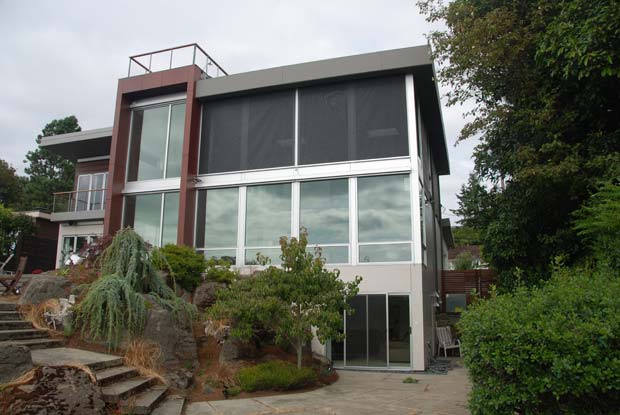
The shades from outside the house. Only the uppers are down in this shot.

Given that the house faces Puget Sound to the southwest and the view side is almost completely glass, it was of utmost importance to engineer a sun management strategy that allowed the house to stay as cool as possible in the summer and as warm as possible in the winter.

For sun control in this situation, there are a few things you can use: long eaves which help shade your windows when the sun is high in the sky, interior shades which block solar rays from hitting your interior surfaces, or exterior shades which block the solar rays before they even hit your windows. The eaves were a given as they fit with the style of the house, but the shades were a very long project in investigation and implementation. The great thing about interior shades is that many different brands are available and you can use them year-round no matter what the conditions are like outside. The downside, however, is that your glass still gets very hot, so they are less effective at keeping rooms cool. The great thing about exterior shades is that they block upwards of 90% of the sun’s energy before it even hits your glass so they are excellent at keeping things cool. However, since they are exposed to the elements, they must be retracted during high winds (of which we get plenty).

Since eliminating heat in the summer was our top priority, we chose exterior shades from Somfy. Somfy is the only company that makes motorized exterior shades that tie nicely into most home automation systems. It would have been nice to have our pick of brands since there is a lot about Somfy I don’t particularly care for (like the fact that they use an old school serial interface), but since they were the only game in town, we went forward with them.

The most difficult part, however, was picking which Somfy system to use. They have a system called RTS which uses easy wireless controls, but the blind motors are “dumb” and can’t give the system status on their position. They are also either “fully up” or “fully down”. You can’t send a command to a blind telling it to move to 10% up at 10am and then 20% up at 11am, etc etc.

The other, newer system is called ILT. These blinds report their positions to the automation system and also can respond to the sort of incremental commands mentioned above. The downside of the ILT system, however, is that it uses a wired serial interface. Somfy just released a wireless Z-Wave interface but it came out too late for us to use it. The Z-Wave interface was supposed to come out last January and we had planned our project around it, but Somfy kept stringing us along on the release date and it didn’t end up coming out until our blinds were already being fabricated. This was extremely maddening as it caused us to run more wire through the house, purchase more equipment from Somfy, and end up with a system that was not Z-Wave aware.

Another maddening thing about the system is that while older Somfy motors like the RTS have an integrated sun and wind sensor that can automatically retract blinds during periods of high wind, the ILT offers no such sensor. Instead I’m in the process of rigging up a Davis Weather Station on my roof that can report weather conditions back to the home automation system, which will then in turn raise and lower the blinds automatically. Yes I know, it sounds like total overkill.

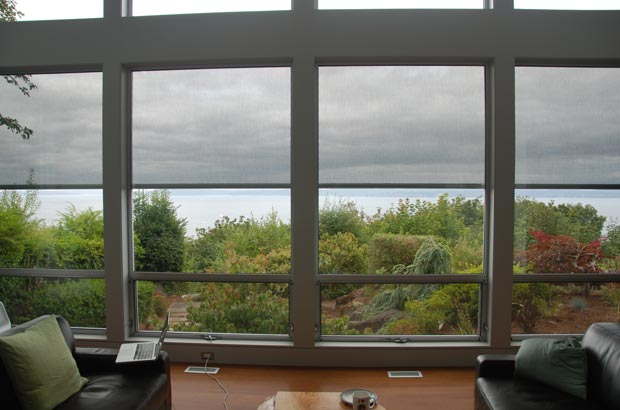
Even though I’m generally very happy with the blinds now, I will admit that I probably overthought the situation a bit. I was under the impression that when the blinds were down, you would barely be able to see out the windows. For this reason, I wanted to do things like incrementally raise and lower the blinds throughout the day according to sun angle. I basically wanted to only lower the blinds as much as necessary at any given time.

As soon as I lowered them for the first time, however, I was shocked at how little they obstructed the view. They are so transparent that sometimes you can’t even tell they are down. Had I known this from the outset, I might have just gone with the RTS setup and not worried about precise blind positions. Long term, I’ll probably be happier with these as I can do things like detect when a window is open and only lower the blinds to the top of that window, but still, the many hours of research and work to get this system into place were not as necessary as I originally thought.

As you can see, there’s virtually no reduction in view when the blinds are down.

While Somfy has been extremely spotty in providing support for my project, my other two partners on this project were great: Atrium Shade fabricated and installed the shades and my buddy Danny Mavromatis of Myro did all the ridiculously cool and complicated home automation tie-ins. Atrium provided the shades (as well as other interior shades throughout the house) at a very reasonable price and Danny expertly enabled me to do things like raise and lower them from my iPhone or any other IP-connected location.

Costs accrued during this stage:

Shades - Interior and Motorized Exterior (Atrium Shade Company)$24,080.00