Archive for the ‘Architecture’ Category

First Interior Renderings

The first interior renderings from Build are in and they look great. I’m really loving how the aluminum framed windows look on west wall of the living room. I’m a bit concerned that all of the interior wood will be overwhelming, but I won’t have a good feel for what it will actually look like until I see multiple angles.

Anyway, here are the two best-looking renderings:

Plans Submitted to City, and Other Updates

A few days ago, Build submitted the official architectural plans to the City of Seattle for approval. There are still some details outstanding like the placement of an extra door, some railing specifics related to the upper stairs, and of course all of the interior details, but apparently unless the outstanding items are significant from a structural or safety standpoint, it’s ok to change them later. We ending up using Swénson Say Faget as our structural engineering consultants and their fee was $2915 (Kevin at Build also has a structural engineering background so it was good to know there were two sets of eyes at work). The non-refundable cost to apply for the demolition and construction permits ended up being $5460.75 and was based on the estimated construction cost of the house. In other words, the more expensive the house, the more the permits are. I’ve been advised that the permitting process takes about six weeks, but since no one in their right mind is building now, it could be quicker.

After initially inspecting the property (at a cost to me of $116.25), the City also required me to submit a full, written geotech report with my application. You may remember that I already paid $350 for a “verbal” geotech report before I bought the property, but I guess when you ask them to write something official up, it’s much more expensive. I used Icicle Creek Engineers this time and the charge was $2700.

Other matters

I don’t have a whole lot of new renderings to display, but here’s one of a proposed ceiling treatment for the living room:

I’m not sure how I feel about it yet, but it — or something like it — will be necessary in order to dampen the echo caused by the vaulted ceilings. The idea is to put something visually nice on the ceiling and pad the area above it with a sound-dampening material.

Also, I’m getting to the point where I need to start thinking about sinks, lighting, appliances, and other interior details. Does anyone have any recommendations as to where the best places to shop online for that stuff is? I’m interested in sites which showcase hardware, lighting, and appliance design as well as retailers where you can actually buy the stuff.

Costs accrued during this stage:

Miscellaneous expenses$223.00
City of Seattle initial site inspection$116.00
Written Geotech inspection$2,700.00
City of Seattle Demolition and Building Permits (Deposit)$5,460.00
Structural engineering services$2,915.00

Framing complete. Sizing crisis averted.

After only five weeks, Scott and the three man crew at Alexander’s Custom Homes have successfully completed framing of the house. They will be back to install the windows and several other things later, but the bulk of their work is done… and done extremely well.

Here is the timelapse of framing phase:

Click to play timelapse

I mentioned in my last post that we encountered a few sizing “issues” during framing, two of which were solved by minor shifts in interior walls, and one of which was unsolved.

The unsolved issue centered around the feeling that, at less than 12 feet, the master bedroom was too shallow. While 12 feet is a perfectly livable depth for a bedroom, it just seemed too cramped, especially for a house designed from scratch for its owner. The girlfriend and I both felt the entire master suite was just too small so we asked Build for options, priced out. The options were:

  1. Move the entire exterior west wall of the master bedroom two feet west, enlarging the bedroom depth by two feet and shrinking the deck depth by two feet. This seemed like the most attractive option, but it was also by far the most difficult because it posed far-reaching structural problems. Turns out we would have had to re-beam a good portion of the house all the way from the north to the south. Approximate cost: $14,000.
  2. Same thing as above but move the wall six feet west instead, to the edge of the deck, eliminating the deck. This was a lot easier structurally, but losing the master bedroom deck did not seem good. Approximate cost: $10,000.
  3. Move only the section of the west wall that is glass two feet west, leaving the structural part of the wall in place. This poses no structural issues, shrinks part of the deck to a 4 foot depth and leaves the other part at a full 6 feet. Approximate cost: $1,500.
  4. Steal a foot from the already small master bathroom and walk-in closet. Approximate cost: $500.
  5. Do nothing. Cost: only disappointment.

After some heavy thinking, option 3 arose as the clear winner. It accomplished the objective of enlarging the master bedroom, didn’t cost too much, and it even improves the deck in a way, since the six-foot-depth area is a bit more private now.

So, sizing crisis averted!

There are a few very important things I learned from this process:

  1. I can’t stress how relieving it is to have a design/build firm whose interests are completely aligned with mine and who isn’t interested in nickel-and-diming me for every little change order that comes along. With many traditional architects and G.C.s, even meeting about such a change would “start the meter” so to speak. Build has been great through all modification requests and I feel very lucky to have a team that cares as much as they do.
  2. Not withstanding the above, I am a bit mad at myself for not doing more during design stage to ensure the house was sized appropriately. In looking at plans, I tended to concentrate on the more obvious questions like “where is the kitchen in relation to the living room and dining room” and “how many bedrooms are on the same floor at the master”. I really never scrutinized actual dimensions of rooms because I just figured there was a standard size for everything that would be either met or exceeded. What I should have done is physically laid out string in an open space somewhere to match the dimensions of each room in the house. Just a quick “reality check”. This lesson gave me a great idea for an invention/business that I may pursue at some point. The bottom line, however, is that it doesn’t matter who your architect is… they are going to design what they think works and if you don’t have the data to know otherwise and say something, you’ll end up with questions and change orders.
  3. In this phase of the project, I will freely admit that I have gone from a “low to medium maintenance” client to a “high maintenance” client, and I think I know why: I am a web designer. My world is not a world in which I spend months planning things with the intent of building them out to the meticulous specs of the plan. My world is a world in which you have an idea, mock something up, prototype a little, iterate, launch, and then keep iterating after that. The foundation is never set, the walls are never nailed, and the paint is never dry. Working on the web is an infinitely iterative process and designing a house is the opposite of that.

Costs accrued during this stage:

Lumber$10,732.00
Lumber$25,656.00
Lumber$1,605.00
Honeybucket rental$117.00
Structural engineering services$232.00
Structural engineering services$155.00
Structural engineering services$775.00
Printing/Reprographic fees$27.00
Framing supplies$1,774.00
Framing supplies$380.00
Framing supplies$714.00
Framing labor$4,565.00
Framing labor$27,813.00
Framing labor$5,412.00
Framing labor$5,625.00
Wood debris hauling$1,089.00
Fence Rental for 6 months$438.00

Roofing complete. Doors are on.

Upon returning from a two week vacation in Peru and the Galapagos Islands a week ago (which was awesome), I was pleased to see all of the progress that was made in my absence. The roof is all done, the siding is beginning to go up, insulation is in, the drywall is being hung, and best of all, the big metal container that’s been in front of the house partially obscuring the livecam is gone!

Roofing

The house has four roof surfaces: the south roof, the north roof, the roof deck between those two roofs, and the garage roof. The north roof and the garage roof are standing seam shed roofs in a warm grey tone. The roof deck will be clad with Trex Brasilia espresso synthetic wood decking. I feel pretty good about these three surfaces.

The only roof I’m still not quite feeling is the south roof. It’s almost flat so it wasn’t a good candidate for standing seam metal, so we went with a white single membrane surface. The white doesn’t look great but at least you can only see it from the roof deck. On the bright side, you can easily walk on the roof and it will also be easy to install solar equipment — which I’ve pre-wired for — when the economics make sense. My main concern with this roof is how the edges look from the street. The edges require a noticeably different treatment than the edges on the shed roofs, and I’m just not feeling the gestalt yet. The plan is to edge the south roof with the same Cembonit cement board panels we’re using on the rest of the house. We’ll see how it goes. I’m reserving judgement until the siding is up and I can see how everything meshes together.

My roofing contractor is Nate Dowers Construction and they have done a bang-up job so far.

UPDATE (5/1/2010): We decided to turn the south roof into a matching standing seam metal one after all. It cost us a few thousand dollars more but it looks better and should last longer than the membrane version. Looks great!

Doors

There are a few different types of doors in this house:

  • Solid-core interior hinged doors
  • Solid-core interior pocket doors
  • Raumplus glass sliders (for laundry, office, and media rooms)
  • Standard exterior hinged doors
  • Huge, super-awesome front doors

So far, everything except the Raumpluses have been installed. The hopefully interesting details are as follows:

  • We ended up going with the Linnea Pocket door locks and they aren’t as bad as I feared. Quite acceptable really, as far as pocket door interfaces go.
  • For the standard interior doors, we went with Karcher Cyprus handles. They are clean looking and feel good on the palms.
  • For the huge, super-awesome front doors, we went with a double-door made of fir veneer. Veneer is apparently much stronger and more resistant to warping than solid wood so that’s what people usually go with these days. The doors are almost nine feet tall. They feel majestic. We’re waiting until the siding and a few other details are done before picking the exact stain color. Some people might choose aluminum framed glass doors for a house like this, but for some reason, I just feel like a house should have wooden doors. Aluminum with glass feels too much like a retail space to me.
  • For the front door hardware, we’re going with the Omnia Urban which looks sharp and meshes nicely with the NanaWall hardware.

Scope additions and shifts

Several items related to carpentry, installation, and various other areas of labor have been shifted in the budget from subcontractors to Build as they’ve taken tasks on themselves. I’m happy to have team Build tackle this stuff because of the high level of work they’ve exhibited so far. Additionally, we’ve added $4000 to the construction management budget — bringing it to $99,000 — to cover a lot of the extra coordination that is going into this project. I’m happy to increase the construction management fee modestly in this way as I feel I’ve gotten plenty of value for the money.

Costs accrued during this stage:

Nate Dowers Construction (roofing labor and materials)$37,008.00
Additional material to convert south roof to metal$2,715.00
Compton Lumber & Hardware (doors)$11,337.00
Builders' Hardware & Supply Co, Inc (door hardware)$2,394.00
McMaster Carr (closet door pulls)$121.00
Miscellaneous expenses$2,007.00
Printing fees$268.00
Honeybucket rental$117.00
Build LLC (various installs, carpentry, doors, labor, etc.)$7,532.00
Build LLC (additional construction management fee)$4,000.00
Gale Contractor Services (insulation)$4,561.00

Architectural visualizations using holograms

As readers of this blog know, I’m a huge fan of photorealistic 3D modeling to aid the architectural design process. In the course of building this house, I had a idea for an invention which could potentially be even more useful than 3D renderings in some cases. I may end up pursuing it… we’ll see.

Via Freshome, however, comes this nifty piece of technology:

A holographic display to aid in the visualization of your new home. Very interesting stuff. It still doesn’t solve the spatial problems I’m looking to solve with my idea, but it’s interesting and potentially useful nonetheless. How much would I have paid for something like this during the design process? Probably only a grand or two. Seems useful though.

Offing the Awning

Every so often, a design element just doesn’t end up looking good. Such is the case for the galvanized steel awning that went up above the front door. There are a few things wrong with it, in my opinion, but of course, this is all subjective:

  • The galvanized steel just doesn’t go with the rest of the house and is too industrial looking.
  • The scale does not look right. It’s neither as thick as the elements around it, nor as thin as some of the aluminum details near it. It also seems like it should span all the way across the box.
  • It doesn’t provide a mechanism to cleanly conceal lighting which should inconspicuously light the front door area.

Sometimes when less-than-ideal elements go up, you can make a few tweaks here and there to salvage the situation, but I think this was just a clear (and rare) case of a design miss. Build is working on some ways to keep the steel structure up to provide stiffness and wrap it with a different material, like aluminum or fir, whilst providing a means to conceal puck lighting inside.

My lesson from this is to stand strong against materials you don’t particularly care for. I’ve never liked galvanized steel and underestimated the effect it would have on the front entryway. I’m sure things will work out fine but this is a misstep I would have rather avoided.

Stacking the decks

Having just spent four years in a condo without a deck, the importance of nailing one’s deck strategy was clear to me from the start of this project. I wanted decks in as many places as it made sense, in order to take advantage of the property’s great views and outdoor entertaining potential.

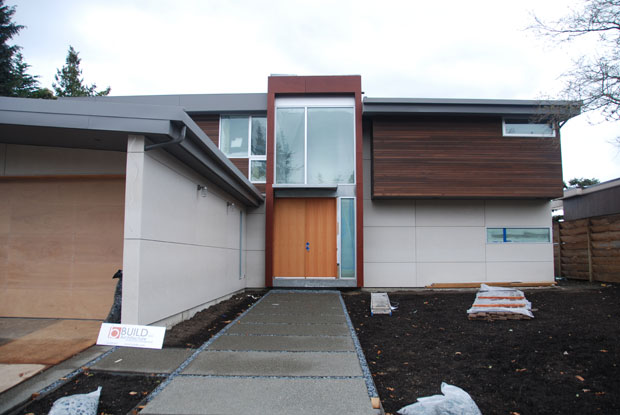
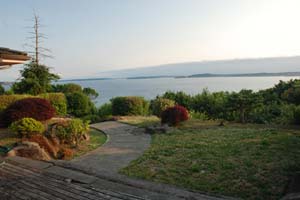
There was already a large patio area outside where the old house used to be so that part was easy. Here’s what the patio looks like now:

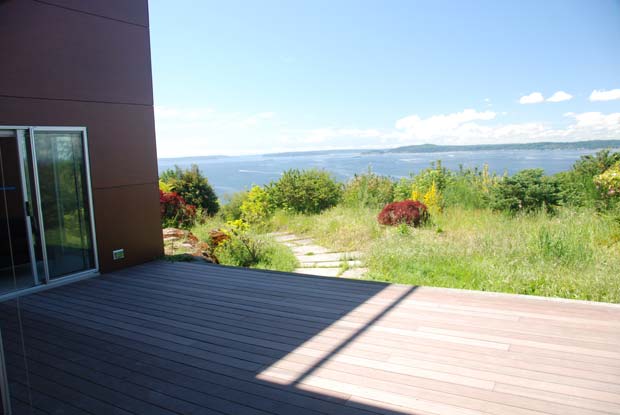
Additionally, the plans called for a master bedroom facing southwest looking over Puget Sound so putting a little reading deck out there was an easy call as well. We ended up making this deck about two feet shallower so we could extend the interior space of the master bedroom out a bit, but it’s still plenty big enough for having a glass of wine or reading a book on. Here’s what it looks like:

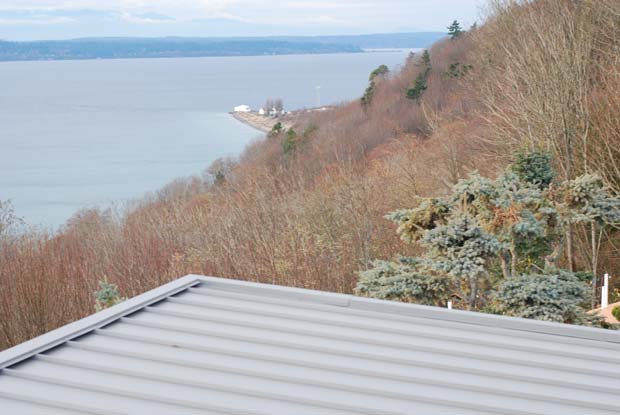
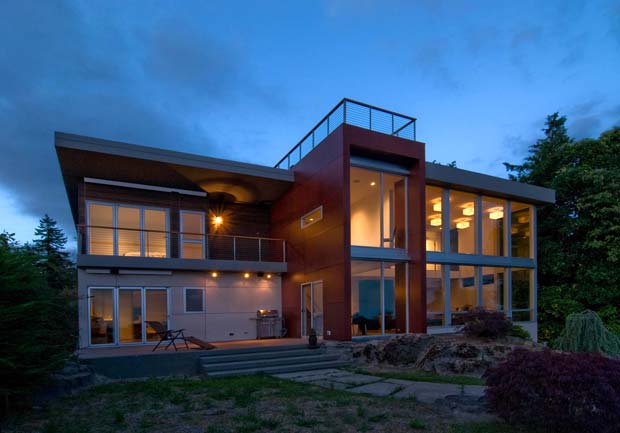
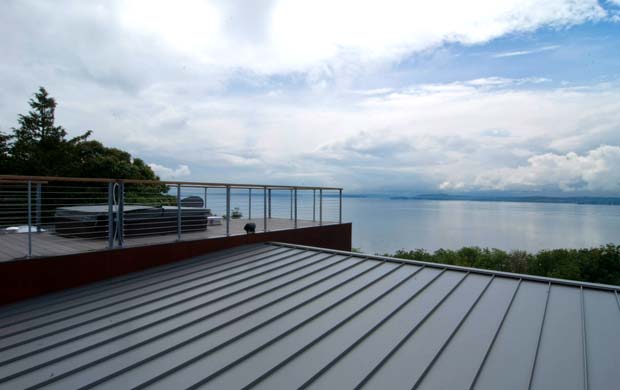
The coup de gras grâce, however, is the rooftop deck. I don’t understand why everybody doesn’t build one of these. Flat roofs with rooftop decks are so much more useful and fun than sloped roofs with, uhhh, shingles. If you have any sort of view whatsoever, you should have a rooftop deck. Here’s how ours ended up:

Now on to some particulars…

For the material, we ended up using Trex Brasilia in espresso color. I did a ton of research into decking materials and concluded that there are no panaceas. The only wood that is as durable and trouble-free as I’d like is ipe, but it cannot easily be stained and tends to silver quickly — a look I was not interested in. Concrete pavers are the lowest maintenance option, but they feel tough on the feet and we already have enough concrete around the outside of the house. Composite decking reviews are all over the map with some installations performing well for people and others exhibiting mold and other problems fairly quickly. We ended up going with Trex because it is a brand that’s been around a long time and it looked the least fake to us. So far so good on the Trex.

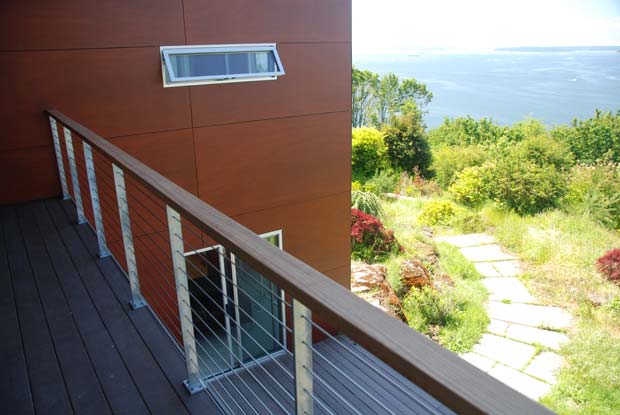
For railings, we went with ipe for its low maintenance qualities. Since it’s just the railing, we don’t mind the silvering here.

For posts, we went with galvanized steel with steel cables running through them. I’m not a huge fan of how galvanized steel looks and went to great pains to minimize its use throughout the project (particularly on the awning), but considering the low profile of the posts, it was a good low maintenance material to use here.

As mentioned in the hot tub post, we went with a HotSpring Sovereign hot tub for the rooftop deck and couldn’t be happier with it so far. It might be the best feature of the house.

Costs accrued during this stage:

Decking materials (Plywood Supply)$6,211.00
Decking parts and labor (Deerly Construction)$5,441.00
Decking materials (Compton Lumber)$1,411.00
Decking materials (Plywood Supply)$2,206.00
Decking parts and labor (Brett Deerly)$4,601.00
Trex Brasilia decking material (Plywood Supply)$1,788.00
Deck railing (Feeney)$3,588.00
Deck flashing (Precision Fabricators, LLC)$592.00
Guardrail galvanizing (Scott Galvanizing)$135.00
Guardrail fabrication (Twisted Metalworks)$5,164.00