Archive for August, 2010 —

Stacking the decks

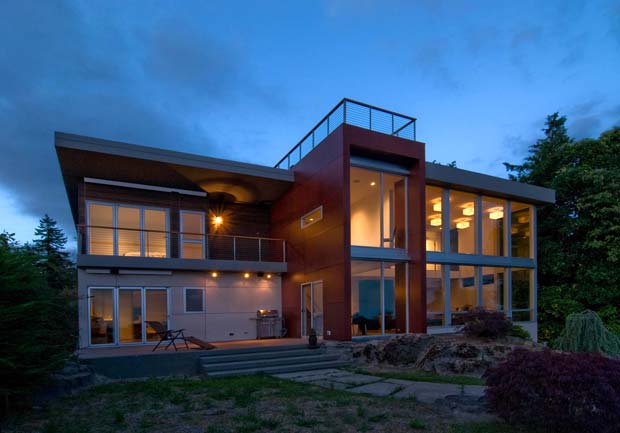
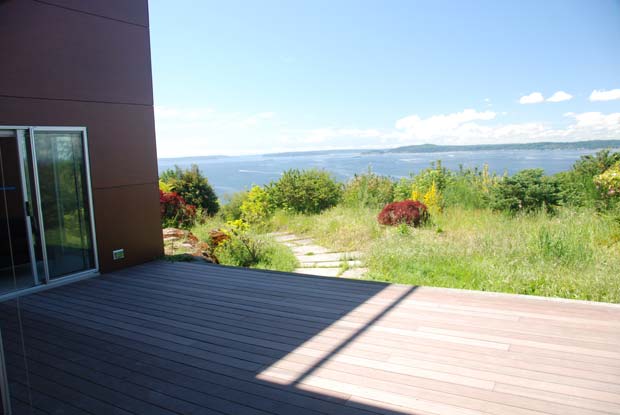
Having just spent four years in a condo without a deck, the importance of nailing one’s deck strategy was clear to me from the start of this project. I wanted decks in as many places as it made sense, in order to take advantage of the property’s great views and outdoor entertaining potential.

There was already a large patio area outside where the old house used to be so that part was easy. Here’s what the patio looks like now:

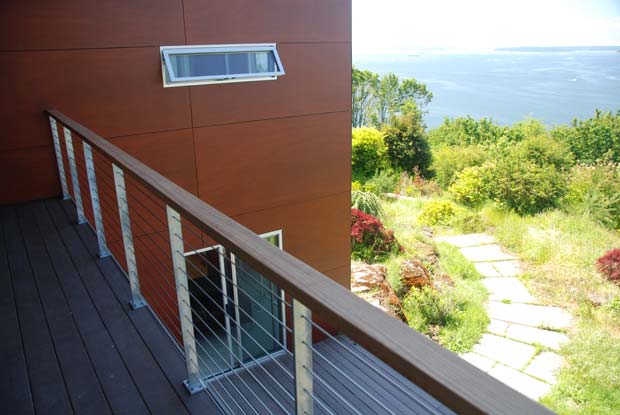
Additionally, the plans called for a master bedroom facing southwest looking over Puget Sound so putting a little reading deck out there was an easy call as well. We ended up making this deck about two feet shallower so we could extend the interior space of the master bedroom out a bit, but it’s still plenty big enough for having a glass of wine or reading a book on. Here’s what it looks like:

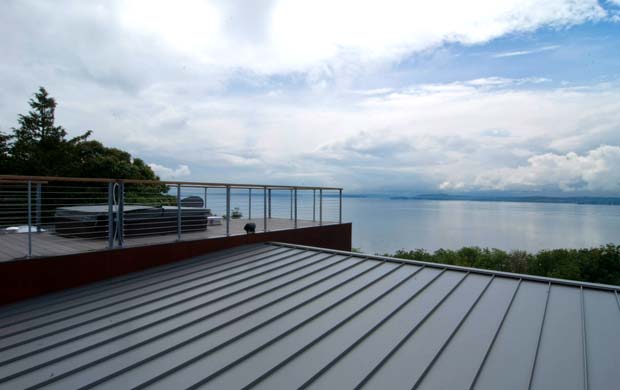
The coup de gras grâce, however, is the rooftop deck. I don’t understand why everybody doesn’t build one of these. Flat roofs with rooftop decks are so much more useful and fun than sloped roofs with, uhhh, shingles. If you have any sort of view whatsoever, you should have a rooftop deck. Here’s how ours ended up:

Now on to some particulars…

For the material, we ended up using Trex Brasilia in espresso color. I did a ton of research into decking materials and concluded that there are no panaceas. The only wood that is as durable and trouble-free as I’d like is ipe, but it cannot easily be stained and tends to silver quickly — a look I was not interested in. Concrete pavers are the lowest maintenance option, but they feel tough on the feet and we already have enough concrete around the outside of the house. Composite decking reviews are all over the map with some installations performing well for people and others exhibiting mold and other problems fairly quickly. We ended up going with Trex because it is a brand that’s been around a long time and it looked the least fake to us. So far so good on the Trex.

For railings, we went with ipe for its low maintenance qualities. Since it’s just the railing, we don’t mind the silvering here.

For posts, we went with galvanized steel with steel cables running through them. I’m not a huge fan of how galvanized steel looks and went to great pains to minimize its use throughout the project (particularly on the awning), but considering the low profile of the posts, it was a good low maintenance material to use here.

As mentioned in the hot tub post, we went with a HotSpring Sovereign hot tub for the rooftop deck and couldn’t be happier with it so far. It might be the best feature of the house.

Costs accrued during this stage:

Decking materials (Plywood Supply)$6,211.00
Decking parts and labor (Deerly Construction)$5,441.00
Decking materials (Compton Lumber)$1,411.00
Decking materials (Plywood Supply)$2,206.00
Decking parts and labor (Brett Deerly)$4,601.00
Trex Brasilia decking material (Plywood Supply)$1,788.00
Deck railing (Feeney)$3,588.00
Deck flashing (Precision Fabricators, LLC)$592.00
Guardrail galvanizing (Scott Galvanizing)$135.00
Guardrail fabrication (Twisted Metalworks)$5,164.00

Basic Painting Strategy

There’s not a whole lot to go over in this post about painting the house, but we’re pretty happy with the strategy we took so far: paint the whole interior white and decide after we’ve settled in what accent walls to paint different colors.

Too often people rush to paint their walls all sorts of crazy colors only to move in and realize the color scheme isn’t going well with their furniture or their lighting. We hired Excel Coatings to paint our exterior soffits grey (to match the metal roof), our interior walls mostly white, and we’ll be calling them back in in a couple of weeks to do a couple of accent walls for us. In the end, we’ve decided to only repaint one wall in the dining room and one wall in the kitchen. It’s really all the house needed and it should hold over us for the next 5-10 years until we paint the whole thing florescent green.

Costs accrued during this stage:

Interior house painting (Excel Coatings)$26,100.00
Paint supplies (Sherwin Williams)$161.00
Exterior house painting (Excel Coatings)$2,672.00
Post-construction painting and touch-ups (Excel Coatings)$5,290.00

The Appliance Package

Choosing appliances can be either fun or frustrating, depending on what type of person you are. If you’re satisfied to just have decent equipment that won’t break down on you, I imagine searching the broad array of available equipment in stores and online is exasperating. If, however, you love researching features, prices, and new technologies, the whole process can be quite fun. It was fun for me. Here is what we picked and why:

Ovens

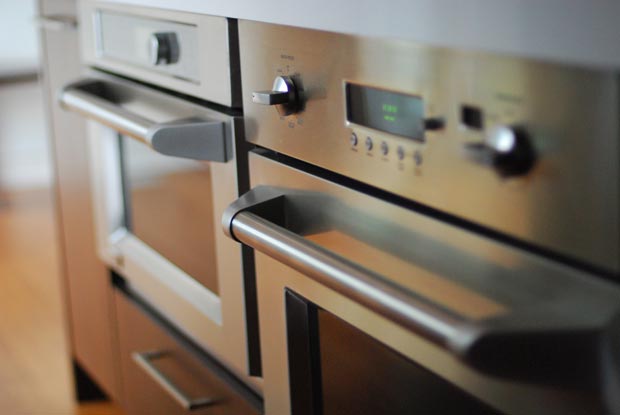
Many people will tell you if you’re building a gourmet kitchen, you need two wall ovens. We do a fair bit of cooking, but two wall ovens seemed just a tad excessive. Additionally, we couldn’t find a microwave that didn’t look cheap (seriously, even Wolf microwaves look terrible) so we came up with a great hybrid solution: one GE Monogram ZET1PMSS convection wall oven and one GE Monogram Advantium ZSC2202NSS speed oven. They both look super pro and the speed oven is pretty amazing. It can cook food in four ways, even simultaneously: with standard electric heating elements, with a convection fan, with microwave rays, and with halogen lights. That last bit is the special bit. The halogen lights allow you to enjoy the speed of microwave cooking but still get the crispiness of traditional cooking.

Nobody ever recommends microwaving a steak, but I put a 10-ounce filet mignon in the Advantium and in exactly 10 minutes, it was more or less perfectly cooked (the steak setting uses all four modes of cooking).

With this solution, we have two ovens when we need them, one microwave that doesn’t look cheap, a special way of speed cooking, and the whole setup only takes up two spaces in the kitchen island.

Cooktop

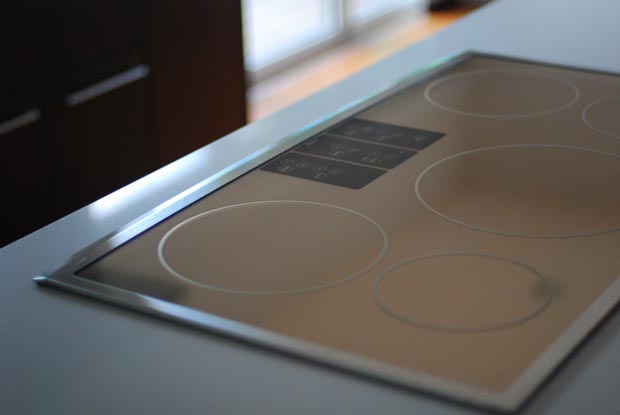
As discussed in Thinking About Induction Cooking, we thought about induction cooking. In fact, we thought so highly of it that we eschewed gas and went for the GE Monogram ZHU36RSMSS 36″ Induction Cooktop in silver. It’s been a perfect purchase so far, doing everything we expected and more. It’s quiet, safe, energy efficient, easy to clean, attractive, and oh so fast. My favorite “house demo” to do so far is pouring a quarter inch of water into a frying pan and watching it boil in under 10 seconds on the induction cooktop.

We didn’t have a whole lot of good cookware to begin with, so we purchased a set of Pro-Clad Emerilware from HSN and a couple of Le Creuset pots to make the most of the cooktop.

If you’re stuck using an electric cooktop or are thinking about putting in a gas one, do yourself a favor and check out induction. Thanks to my buddy Jim Ray of Salt and Fat for the initial recommendation and peer pressure.

Dishwasher

Based on the advice of some friends and family, we ended up choosing a Miele Optima G2472SCVI dishwasher over our previous frontrunner, Bosch. It’s very quiet and the rack space is arranged intelligently and flexibly. I don’t really have any complaints about it besides the user interface being a little, umm, austere. Thankfully you don’t really use the UI of a dishwasher too often, but it looks like it was designed ten years ago. We got a fully integrated model, meaning there are no visible buttons or surfaces (it just looks like another cabinet). I do wish the little red light that tells you the thing is on shined on the floor instead of the underside of the cabinet, but oh well. All in all, it seems like a solid dishwasher so far.

Side note: Dishwashers were probably the most infuriating appliance to research. Almost every manufacturer’s site, especially Bosch and Miele, are atrociously designed and impossible to get any useful comparison information from.

Kitchen Hood

Kitchen hoods can be the biggest ripoff of all household appliances. It’s basically a fan surrounded by some steel and these things can get into the $5000 range. Rubberduckulous. Via the recommendation of Build, we went with the sharp, understated Zephyr ZRME36BS Roma island hood. It was “only” about a thousand dollars and it’s worked great so far. It sucks a lot of air, looks great above the cooktop, and doesn’t attract fingerprints too easily.

Refrigerator

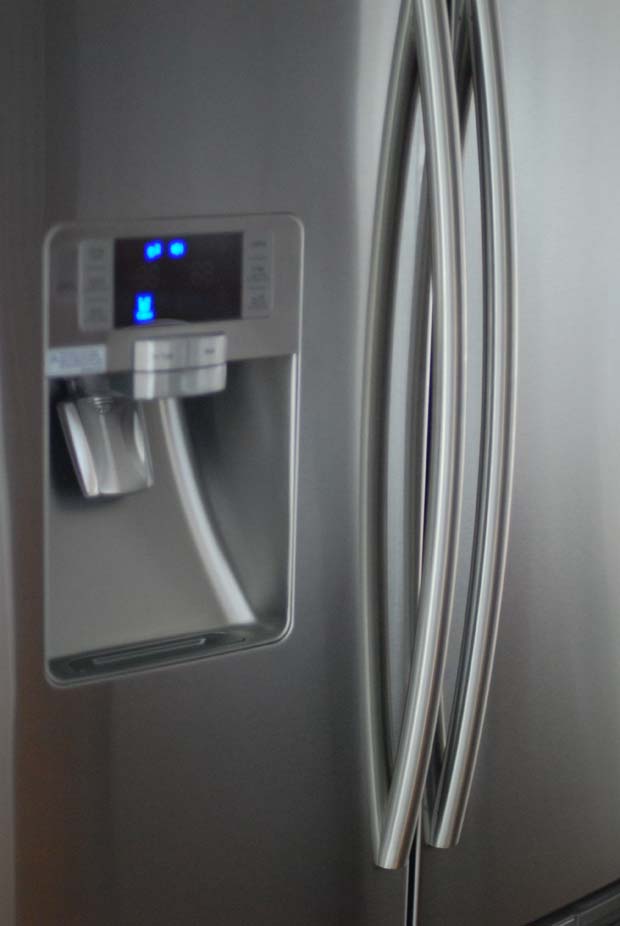
Refrigerators are one of those items you’re really best of consulting Consumer Reports for, so we did. There are just a lot of things about fridges that you can’t easily test out yourself (like how evenly they cool or how long they last without repairs) and CR has already done this work for you. Just about the only things we knew going in were that we wanted a french-door-bottom-freezer model because the layout was so convenient and that we wanted ice and water on the outside of the door. Thankfully, Consumer Reports’ top-rated model, the Samsung RFG237AARS French Door refrigerator, fit the bill perfectly. We had originally spec’d the full depth model which is several cubic feet larger, but because of how the kitchen was designed, we had to switch to the counter-depth model. So far it’s been a great fridge, although we will admit to still wishing we had been able to fit the full-depth version.

When people ask me what type of fridge I got and I answer Samsung, it often elicits puzzled looks. Usually people think of big Sub Zeros and Vikings when they think of gourmet kitchens, but read the reviews… they aren’t great. The Samsung provided us all we needed: an attractive, well designed, well reviewed fridge with all of the features we wanted for an affordable price.

Washer and dryer

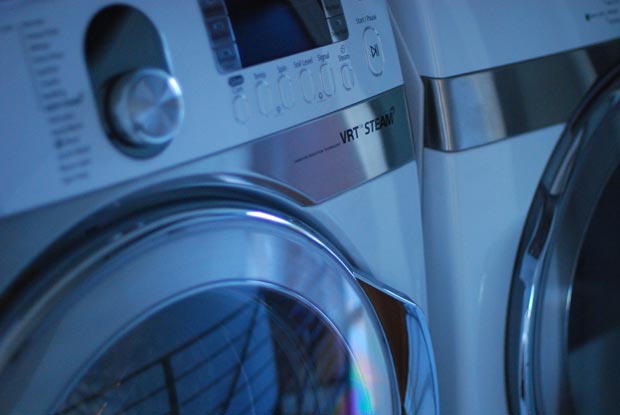
Much like fridges, washers and dryers are too complicated to fully understand without the help of a place like Consumer Reports. Since we put our machines upstairs, right next to the master bedroom, our number one concern was picking the quietest washer/dryer pair on the market. The number two concern after that was how well the machines laundered clothes, and the final concern was durability. In the end, it came down to either the Electrolux EWFLS70JIW (and matching dryer) or the Samsung WF448AAW Washer and DV448AEW Dryer. We loved the Electrolux user interface and purported 18-minute “short cycle”, but according to all reports, the Samsungs were simply the quietest machines on the market and had a longer track record of reliability.

So far, the Samsungs have been spectacular. We’ve even grown to love the happyfun Korean melodies they play when they’re done with their cycles. They also have something called SilverCare which needs to be seen to be believed. Watch this Consumer Reports video test of the technology.

All in all, we’re very happy with all of the appliances we’ve chosen. Thanks also to Albert Lee Appliance Company for providing all of the non-GE appliances (I get an employee discount for the GE stuff since I work at msnbc.com). They matched or beat all online prices that I quoted over the phone to them, and as a result, got all of my business (hint: do this!).

Costs accrued during this stage:

GE Monogram 30" Convection Single Wall Oven (ZET1PMSS)$2,667.00
GE Monogram Built-In Oven with Advantium (ZSC2202NSS)$2,437.00
GE Monogram 36" Induction Cooktop (ZHU36RSMSS)$2,273.00
GE 4 year extended warrantees$328.00
Miele Optima dishwasher (G2472SCVI)$1,805.00
Zephyr Roma island hood (ZRME36BS)$999.00
Samsung Washer (WF448AAW)$1,299.00
Samsung Electric Dryer (DV448AEW)$1,192.00
Samsung French Door refrigerator (RFG237AARS)$2,206.00
Delivery charge for GE appliances$50.00
Driptite custom washer/dryer pan$141.00

Mitigating Solar Gain with Motorized Shades

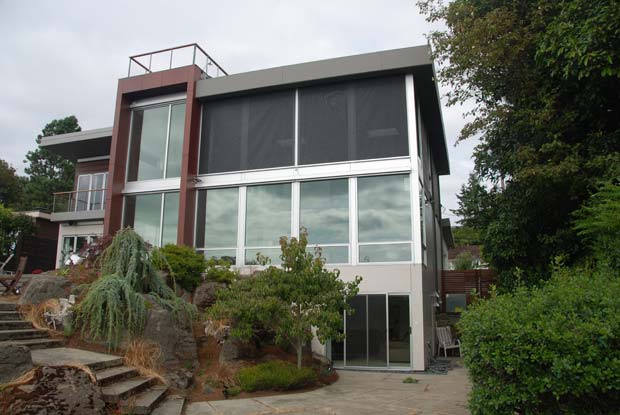
The shades from outside the house. Only the uppers are down in this shot.

Given that the house faces Puget Sound to the southwest and the view side is almost completely glass, it was of utmost importance to engineer a sun management strategy that allowed the house to stay as cool as possible in the summer and as warm as possible in the winter.

For sun control in this situation, there are a few things you can use: long eaves which help shade your windows when the sun is high in the sky, interior shades which block solar rays from hitting your interior surfaces, or exterior shades which block the solar rays before they even hit your windows. The eaves were a given as they fit with the style of the house, but the shades were a very long project in investigation and implementation. The great thing about interior shades is that many different brands are available and you can use them year-round no matter what the conditions are like outside. The downside, however, is that your glass still gets very hot, so they are less effective at keeping rooms cool. The great thing about exterior shades is that they block upwards of 90% of the sun’s energy before it even hits your glass so they are excellent at keeping things cool. However, since they are exposed to the elements, they must be retracted during high winds (of which we get plenty).

Since eliminating heat in the summer was our top priority, we chose exterior shades from Somfy. Somfy is the only company that makes motorized exterior shades that tie nicely into most home automation systems. It would have been nice to have our pick of brands since there is a lot about Somfy I don’t particularly care for (like the fact that they use an old school serial interface), but since they were the only game in town, we went forward with them.

The most difficult part, however, was picking which Somfy system to use. They have a system called RTS which uses easy wireless controls, but the blind motors are “dumb” and can’t give the system status on their position. They are also either “fully up” or “fully down”. You can’t send a command to a blind telling it to move to 10% up at 10am and then 20% up at 11am, etc etc.

The other, newer system is called ILT. These blinds report their positions to the automation system and also can respond to the sort of incremental commands mentioned above. The downside of the ILT system, however, is that it uses a wired serial interface. Somfy just released a wireless Z-Wave interface but it came out too late for us to use it. The Z-Wave interface was supposed to come out last January and we had planned our project around it, but Somfy kept stringing us along on the release date and it didn’t end up coming out until our blinds were already being fabricated. This was extremely maddening as it caused us to run more wire through the house, purchase more equipment from Somfy, and end up with a system that was not Z-Wave aware.

Another maddening thing about the system is that while older Somfy motors like the RTS have an integrated sun and wind sensor that can automatically retract blinds during periods of high wind, the ILT offers no such sensor. Instead I’m in the process of rigging up a Davis Weather Station on my roof that can report weather conditions back to the home automation system, which will then in turn raise and lower the blinds automatically. Yes I know, it sounds like total overkill.

Even though I’m generally very happy with the blinds now, I will admit that I probably overthought the situation a bit. I was under the impression that when the blinds were down, you would barely be able to see out the windows. For this reason, I wanted to do things like incrementally raise and lower the blinds throughout the day according to sun angle. I basically wanted to only lower the blinds as much as necessary at any given time.

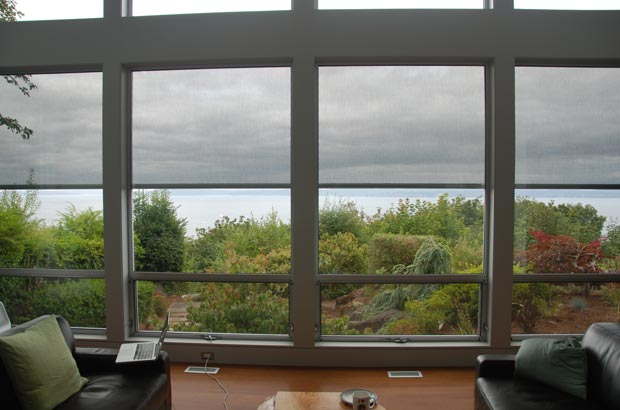
As soon as I lowered them for the first time, however, I was shocked at how little they obstructed the view. They are so transparent that sometimes you can’t even tell they are down. Had I known this from the outset, I might have just gone with the RTS setup and not worried about precise blind positions. Long term, I’ll probably be happier with these as I can do things like detect when a window is open and only lower the blinds to the top of that window, but still, the many hours of research and work to get this system into place were not as necessary as I originally thought.

As you can see, there’s virtually no reduction in view when the blinds are down.

While Somfy has been extremely spotty in providing support for my project, my other two partners on this project were great: Atrium Shade fabricated and installed the shades and my buddy Danny Mavromatis of Myro did all the ridiculously cool and complicated home automation tie-ins. Atrium provided the shades (as well as other interior shades throughout the house) at a very reasonable price and Danny expertly enabled me to do things like raise and lower them from my iPhone or any other IP-connected location.

Costs accrued during this stage:

Shades - Interior and Motorized Exterior (Atrium Shade Company)$24,080.00

How to Design a Perfect Bathroom

Bathrooms are a big deal. People sink a lot of money into them because of the labor and materials involved, but rarely do homeowners take a close look at the usability of their prospective new bathroom before opening their wallets. This post will discuss how we planned our bathrooms and what guidelines you should follow when designing your own.

To match or not to match

Most of this post will concentrate on the master bathroom, but one question that will come up early in your project is “does each bathroom need its own distinct personality?” Because of the wealth of materials and styles available, many people are tempted to design each bathroom to be much different than its peers. We designed our bathrooms in partnership with The NB Design Group and Build and both companies advised against trying to get too cute with individual bathroom styles. Each can have some distinct qualities, of course, but when you walk through someone’s house and one bathroom looks like the “aquarium” one and one looks like the “dark marble” one and another looks like “spartan” one, it tends to look a little forced. For this reason, we decided to follow the same general color and tile scheme for all of our four bathrooms. Some are nicer than others but they all look like part of a family.

It all starts with the shower

To me, the most important thing to get right in a master bathroom is the shower. You’re going to use it every day, and many times — if properly designed — it’s going to transport you from a murky web of morning grogginess and hangovers to a refreshed and invigorated state. Not only do you want to eliminate the common problems with showers but you also want to add the best components you can in order to maximize awesomeness. This is something you can do without building a brand new house by the way: take care of your shower and main bathroom and you’ll leave for work a much happier person.

The showerhead

If the most important part of the bathroom is the shower, then the most important part of the shower is the showerhead. I am a bit of a showerhead snob and we went through six heads before finding the perfect one. I will just go ahead and save you the time and tell you what the best showerhead in the world is: The Kohler Flipside. It is truly an amazing showerhead, and if you’re reading this blog without having started your new home yet, just do yourself a favor and buy it. They are on sale for $71 at Home Depot right now.
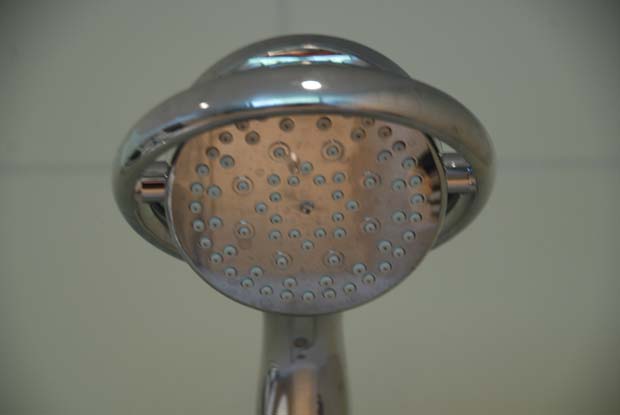
Let me count the ways I love this showerhead:

  1. You can easily remove the flow restrictor, creating an torrent of spray even Cosmo Kramer would appreciate.
  2. 3 of the 4 spray settings are wonderful. One feels like you’re going through a carwash. The problem with most multi-setting showerheads is that usually only one setting is good, and on that setting, you’re only using maybe 20% of the head’s nozzles. On the Flipside, you’re using all of the nozzles on whatever face you’re flipped to.
  3. It has a built-in handshower.
  4. It looks great.
  5. Both the girlfriend and I actually agree that it is the best showerhead ever, and we never agree on showerheads.

This showerhead is so good that I may buy an extra to have around for when this one needs to be replaced and it is inevitably discontinued.

Even if you’re not going to take my advice on the Flipside, make sure you have a shower arm installed that fits all standard half-inch showerheads. Originally we had a Kohler Purist showerhead (beyond terrible) and arm installed and unfortunately the arm is not separable from the head. This is a huge design problem, in my mind. A homeowner must be able to experiment with different showerheads and find their favorite.

Pipes and valves

You should have your shower lines run with 3/4 inch piping (as opposed to 1/2 inch) in order to make sure you have enough flow to do what you want. Similarly, pay special attention to what valves you specify. We originally had a standard Kohler thermostatic valve spec’d that not only was meant for a different type of system (the type where you control volume and temperature on the same knob), but also it only allowed about 5 gallons per minute through. If you have anything special in your shower like bodysprays, you’re going to need more than 5 GPM. We ended up installing the excellent Kohler 669-KS which will let a whopping 17.2 gallons per minute through if you want it to (which of course, we don’t).

Shower controls

The most important thing about shower controls is that they should not be placed underneath the showerhead. At least 90% of showers get this wrong, probably just out of builder convenience or laziness. You should be able to step into your shower, fiddle with your knobs, wait until the temperature is right, and then hop into the spray. Consider putting your controls as far away from the showerhead as possible. You’ll thank yourself every morning for it.
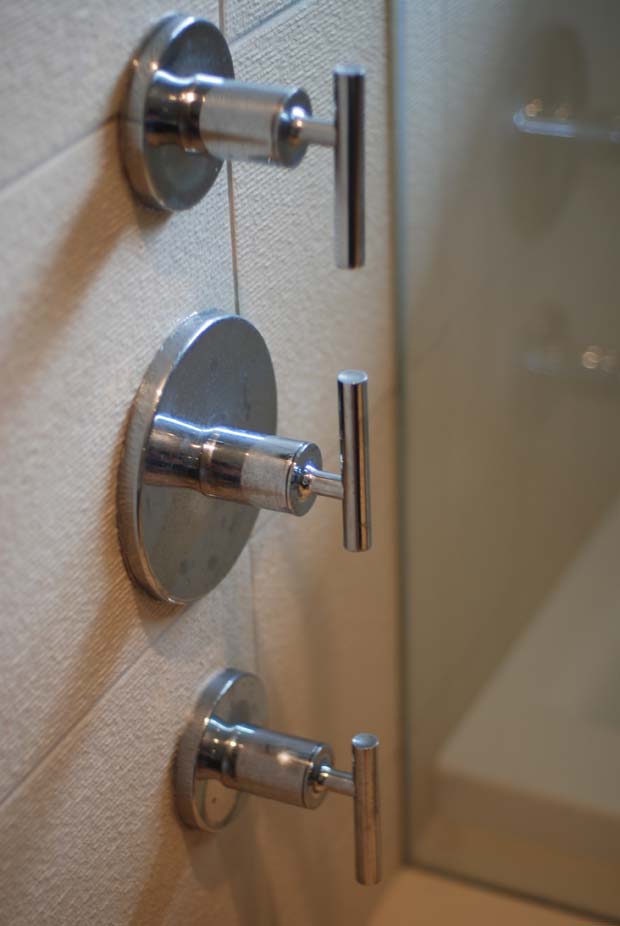
The other issue relating to controls is which type of user interface to go with. Most showers these days are controlled from a single knob that turns the water volume and temperature up simultaneous in a clockwise motion. It sickens me that this interface has become standard. I think it coincided with the 2.5 GPM MAX law, the thinking being “why would you ever want the water at anything less than full blast?”. I much prefer a knob for volume and a knob for temperature. That way, the temperature one stays in more or less the same position and the volume one(s) can be turned independently to affect flow. If you are designing a system like this, make sure your plumber knows your intention and make sure you buy the right valves and trim for it. Some plumbers will do this thinking for you. Others will not. Know which type you hired.

Bodysprays

We put two bodysprays in the shower just to make sure we had the option of using them, but we rarely actually do. They are nice to have occasionally, but I wouldn’t call them a must, especially if you have the Flipside. If you need to cut bodysprays out because of budget or installation challenges, I say go ahead. If you want them, however, maybe go with three instead of two.

Glass

We went with a special type of glass called Starphire that has much less of a green tint around the edges. It is also a bit more etch-resistant than normal glass because it’s coated with something called Showerguard. It’s nice, and I recommend it, but not a must. The company who fabricated and installed our glass is Distinctive Glass.

Radiant heat, in the shower!

Since we did electric radiant heating pads underneath the tile in the master bathroom, Build surprised me and ran the pads right underneath the shower tile as well. Very, very awesome. No more curling of toes in the morning while inching into a cold shower. If you’re already doing radiant in the bathroom, there is no reason not to run it into the shower as well.

Shaving step

We had a small step built into the shower for leg shaving. You can do this with a wooden stool as well, but if you’re starting from scratch, might as well build the little step. It’s only maybe 6 inches deep, 15 inches wide, and a foot and a half tall, but it gets the job done… or so I’m told.

Alcove for bottles

Last but not least, we had a little alcove carved into the side of the shower to hold bottles and other shower-related things. Notably, we specified that the alcove be double-height with a glass shelf in-between. Shower alcoves never hold enough stuff so we were determined to build one that did. And it does.

… and those are the elements of a perfect shower.

The tub
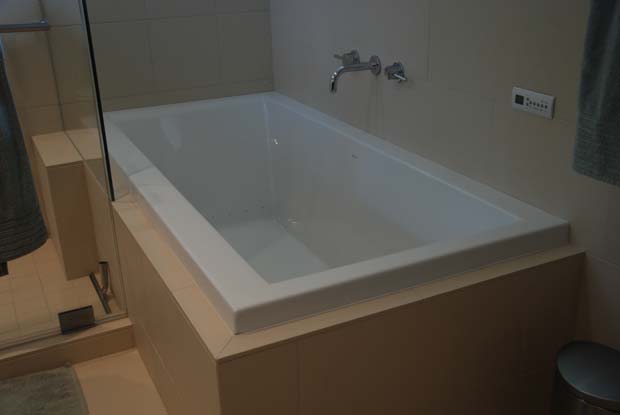
We debated whether or not to have a tub at all in the master bathroom given the hot tub on the roof, but it was only a few thousand dollars extra and there are definitely nights in Seattle which are too cold and wet to want to use mess with a hot tub, so we put one in. We ended up going with a BainUltra Origami, which is an “air tub”. Air tubs don’t use water jets but rather air jets. Because they don’t use water jets, you can safely use bath oils and salts without ruining the system. We call the two tubs Fat Man and Little Boy. I haven’t actually used Little Boy yet, but the girlfriend says it’s the best bath in the world… so there’s that. Also, another bonus about the Origami is it lacks “old man handles”… the ugly clear plastic handles that adorn many popular baths.

Tile strategy

One of the most difficult parts of the entire building process was getting a grip on tile strategy. There are just so many different types of tiles out there (and most will be dated within years or months) that it’s tough to know where to start. Nancy Burfiend at the NB Design Group and the folks at Build gave us some great guidelines that we ended up following:

  • Use big tiles to make small spaces look bigger
  • Use the same tiles up the walls that you use on the floors
  • Use ceramic tile for durability and timelessness
  • Use a tile with a different texture or size as your main tile (but the same color) to add interest without being over the top

Using these guidelines, we chose off-white ceramic tile, ran it across the floor and halfway up the walls and then used smaller and grainier versions of the same for inside the shower. For the backsplash, we went with small glass subway tile. Neric Pro Build did all of the tile installation for a very reasonable price, and with a little bit of coaching and oversight, everything turned out swimmingly.

Faucets and sinks

Sinks are largely a personal affair, but we found what we wanted with these Ronbows. Simple, modern, white, and not likely to be dated any time soon. Vessel sinks are nice and all but every time I see one, I look at my watch and wonder how many months until they are out of style.
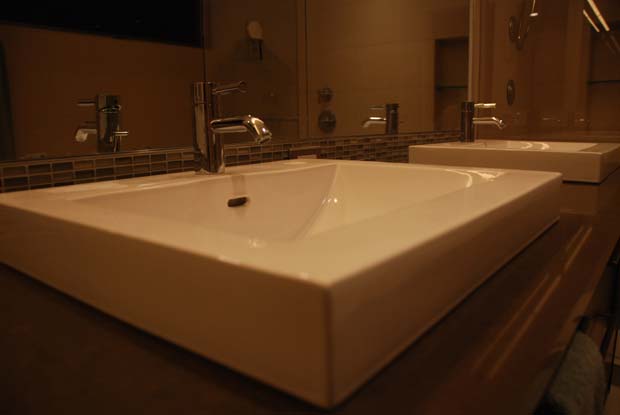
For the faucets, we fell in love immediately with the famous Dornbracht Meta series. What we didn’t fall in love with, however, was the price. I searched for weeks online and around town for a decent Dornbracht knockoff, but every single one had something wrong with it. Too fat, too thin, not the right angle, etc etc. None of them matched the beauty of a real Dornbracht.

Then, I finally found one! It’s called the Taron 101 and it’s available for about half the price of the Dornbracht. We ended up doing real Dorns in the master and three Tarons elsewhere around the house, and I have to say, I almost like the Tarons better. They seem very well built, and for half the price, I’m diggin’ em.

The following paragraph is intended to help others in their similar quests for reasonably priced Dornbracht alternatives by indexing some search terms on Google… please ignore if you’re a human:

dornbracht knockoff, dornbracht copy, cheaper dornbracht, dornbracht alternative, affordable dornbracht, imitation dornbracht, generic dornbracht, chinese dornbracht

If you came in from Google because of that paragraph, you’re welcome.

Countertops

As in the kitchen, we went with quartz countertops in the bathrooms. While the kitchen is Pental Chroma, the bathrooms are Cambria. Quartz is affordable, durable, and modern. A perfect fit for our needs.

Audio

While my friend Danny advised putting audio in every bathroom and I felt like I needed one, we went ahead and wired just the master into the whole house audio system. We don’t use it much, but it’s a good move if it’s on your agenda.

Commodes

Our toilets are Toto Pacificas. Affordable, modern, and a simpler-than-usual design that allows for easy cleaning. Wall mounted toilets are also nice, but we opted for simple, proven floor mounted ones.

Radiant heat

As mentioned above, we ran electric radiant heating pads underneath our tile. These are on a simple digital timer which cranks the tiles up to 85 degrees or so for an hour or two in the morning and then keeps the heat off for the rest of the day. For several hundred dollars, it’s a worthy addition.

A recirc line

If your master bathroom is far away from your water heater, you’re going to want your plumber to run a “recirc line” from the water heater to someplace near your bathroom. The recirc line is on a timer and runs a fresh supply of hot water close to your bathroom so it doesn’t take three minutes for your shower to get warm. Smaller houses or houses with multiple tankless water heaters may not need this, but if your water tank is two floors below your bathroom, you will get great use out of this little bit of technology.

Lighting

Finally, there is the lighting. We put standard 5 inch cans in our bathrooms with the notable addition of Alinea bars in our master and powder room. Alineas are seldom-used fixtures that provide an interesting type of lighting: linear incandescence. Think of a long florescent tube but with a nice warm incandescent glow instead of a cold harsh florescent one. We put a long one of these above the mirrors. On the upside, it warms up the space nicely. On the downside, it cannot be dimmed without buzzing so it’s either all on or all off. Some people recommend placing lighting on the sides of your mirrors instead of above, but the Alinea seems not to cast the sorts of shadows this advice aims to avoid.

Wrap up

And so there you have it… the elements of a well-designed bathroom. Whether you’re building new, remodeling your current place, or just hate your showerhead, hopefully you can apply principles from this post to your own projects. Bathrooms are only about looks when you sell the place or are entertaining… all other times, they are about usability. Pay close attention to the usability of your bathrooms and you’ll forward to more of your mornings.

UPDATE: For a lot more shots of the bathroom details, check out the Bathroom section in the photo gallery.

Costs accrued during this stage:

Two Broan medicine cabinet mirrors (kitchensource.com)$274.00
Two replacement Broan medicine cabinet mirrors (ventingdirect.com)$325.00
Bathroom mirrors and shower doors (Distinctive Glass, Inc)$5,038.00
Gatco Latitude II Towelbars/Holders/Etc. (ComfortHouse.com)$366.00
Modern Bathroom (Chinabrachts)$675.00
Buy Aggressive (Cascade Bath Filler)$337.00
Seattle Interiors (Laufen Palomba sink)$929.00
Blanco Magnum kitchen sink (HomePerfect)$598.00
Hansgrohe Interaktiv S kitchen faucet (HomePerfect)$310.00
Two Dornbracht faucets$922.00
Plumbing installs$13,681.00
Counter and tile work - kitchen+baths (Neric Pro Build)$24,703.00